· Jack Lee · Tutorials · 9 min read
The Practical Guide to Self-Hosting Web Applications on Hetzner VPS with Dokploy
A comprehensive hands-on guide to deploying web apps with a low-cost and simple self-managed solution.
While working in the industry over the years, I’ve come to realize that developing ML code is just a small part of a much larger system when it comes to deploying real-world applications. Google’s 2015 paper, Hidden Technical Debt in Machine Learning Systems, remains just as relevant today; highlighting how infrastructure, security, and scalability often take center stage in production systems. This realization pushed me to develop a more well-rounded full-stack skillsets, bridging the gap between model development and real-world deployment.
In this guide, I’ll walk you through how to deploy a web application, whether it’s a standard frontend or an ML-powered backend, on Hetzner VPS using Dokploy and GitHub Container Registry, while securing it properly with Cloudflare and best practices; alongside with CI/CD workflows using GitHub Actions. If you’re an ML engineer (or any developer) looking to build production-ready, self-hosted applications without the complexities and cost of AWS, GCP, or Azure, this is for you.
Table of Contents
- Step 1: Buying a Domain & Setting Up Cloudflare DNS
- Step 2: Setting Up a Hetzner VPS
- Step 3: Setting Up Dokploy
- Step 4: Setting Up GitHub Container Registry
- Step 5: Setting up Dokploy Application with CI/CD
- Conclusion
- Reference
Step 1: Buying a Domain & Setting Up Cloudflare DNS
Purchase a domain from Porkbun, Namecheap, or any other registrar.
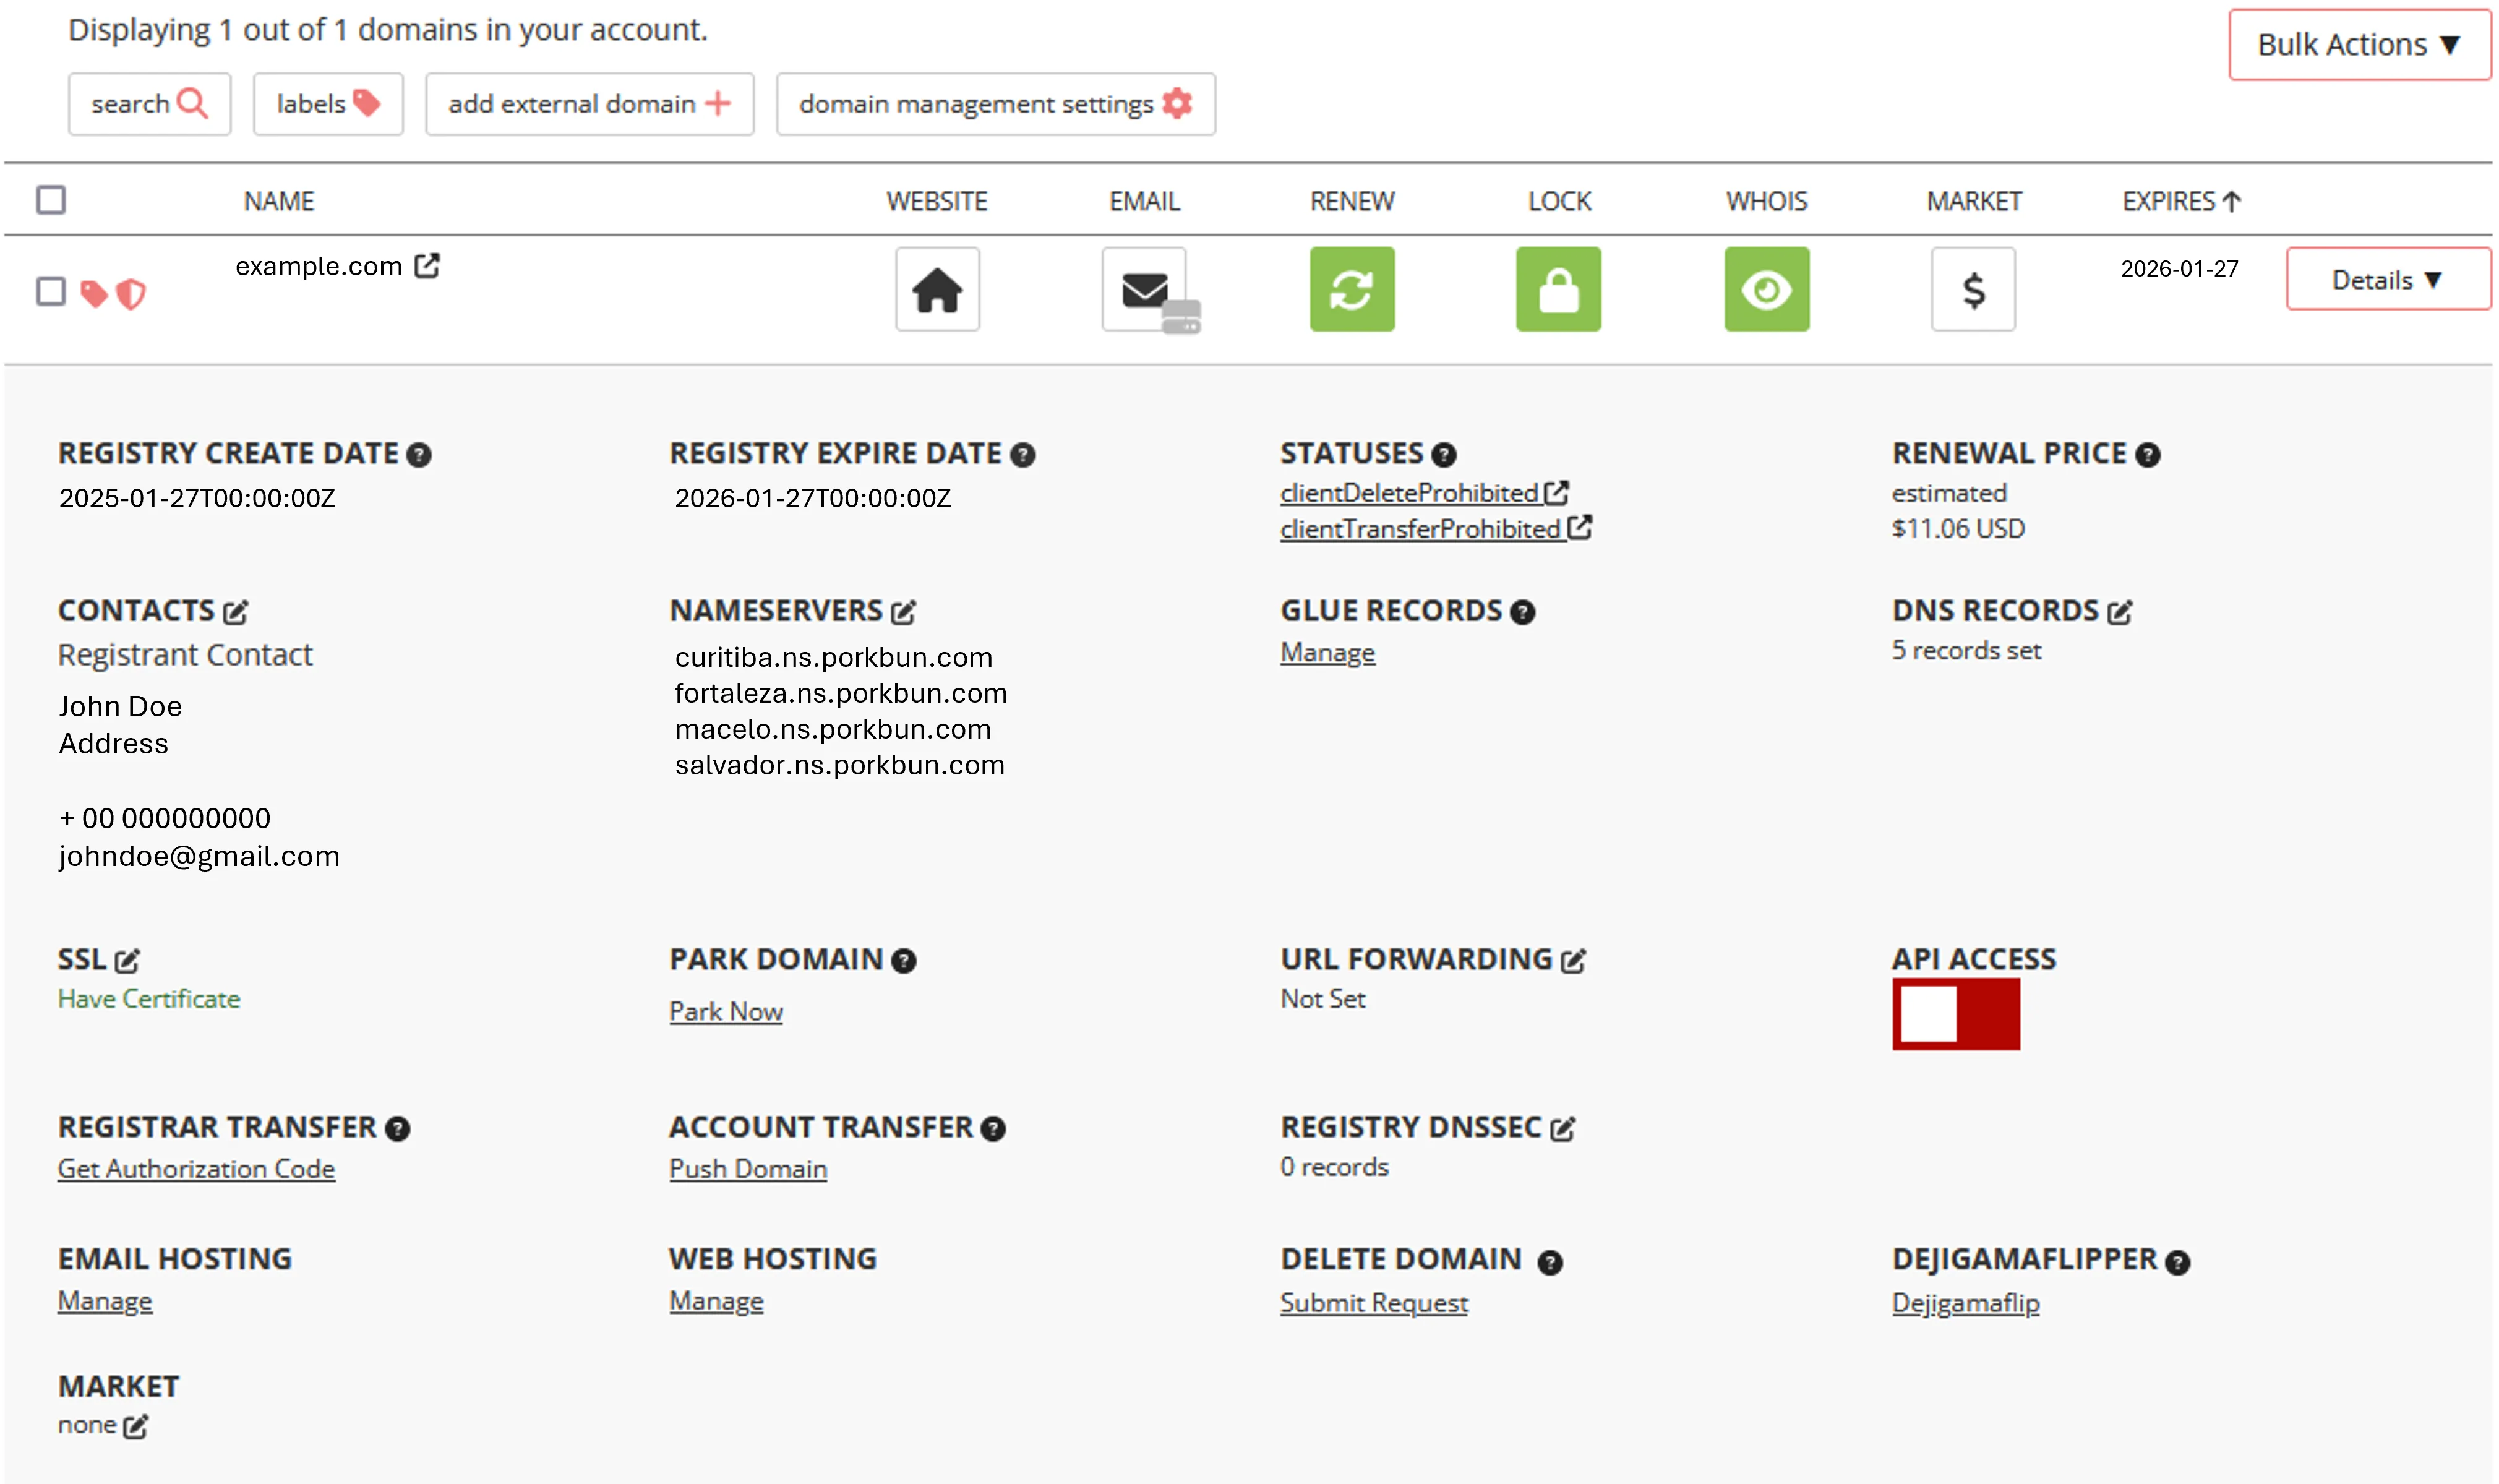
Porkbun Domain Interface Update your domain’s nameservers to Cloudflare.
- Add the purchased domain to Cloudflare
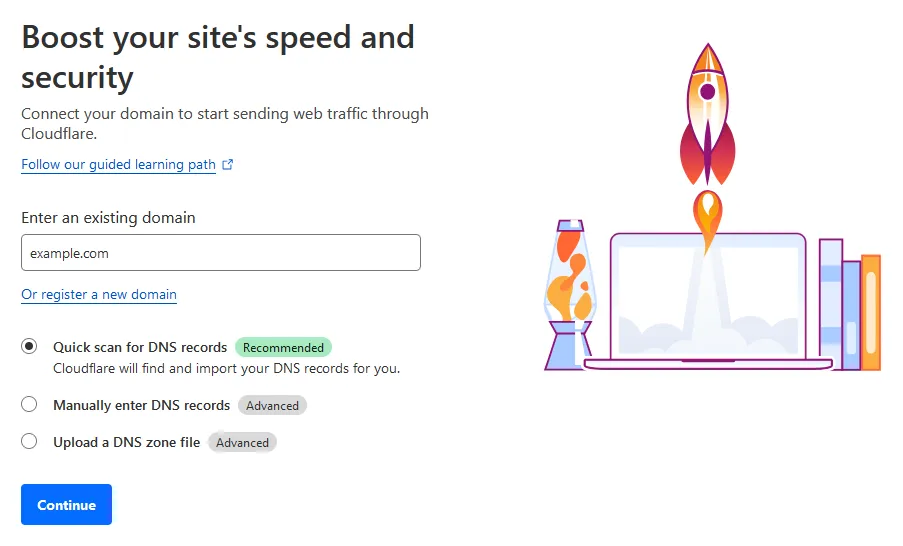
Cloudflare Starting Page - Select the free plan
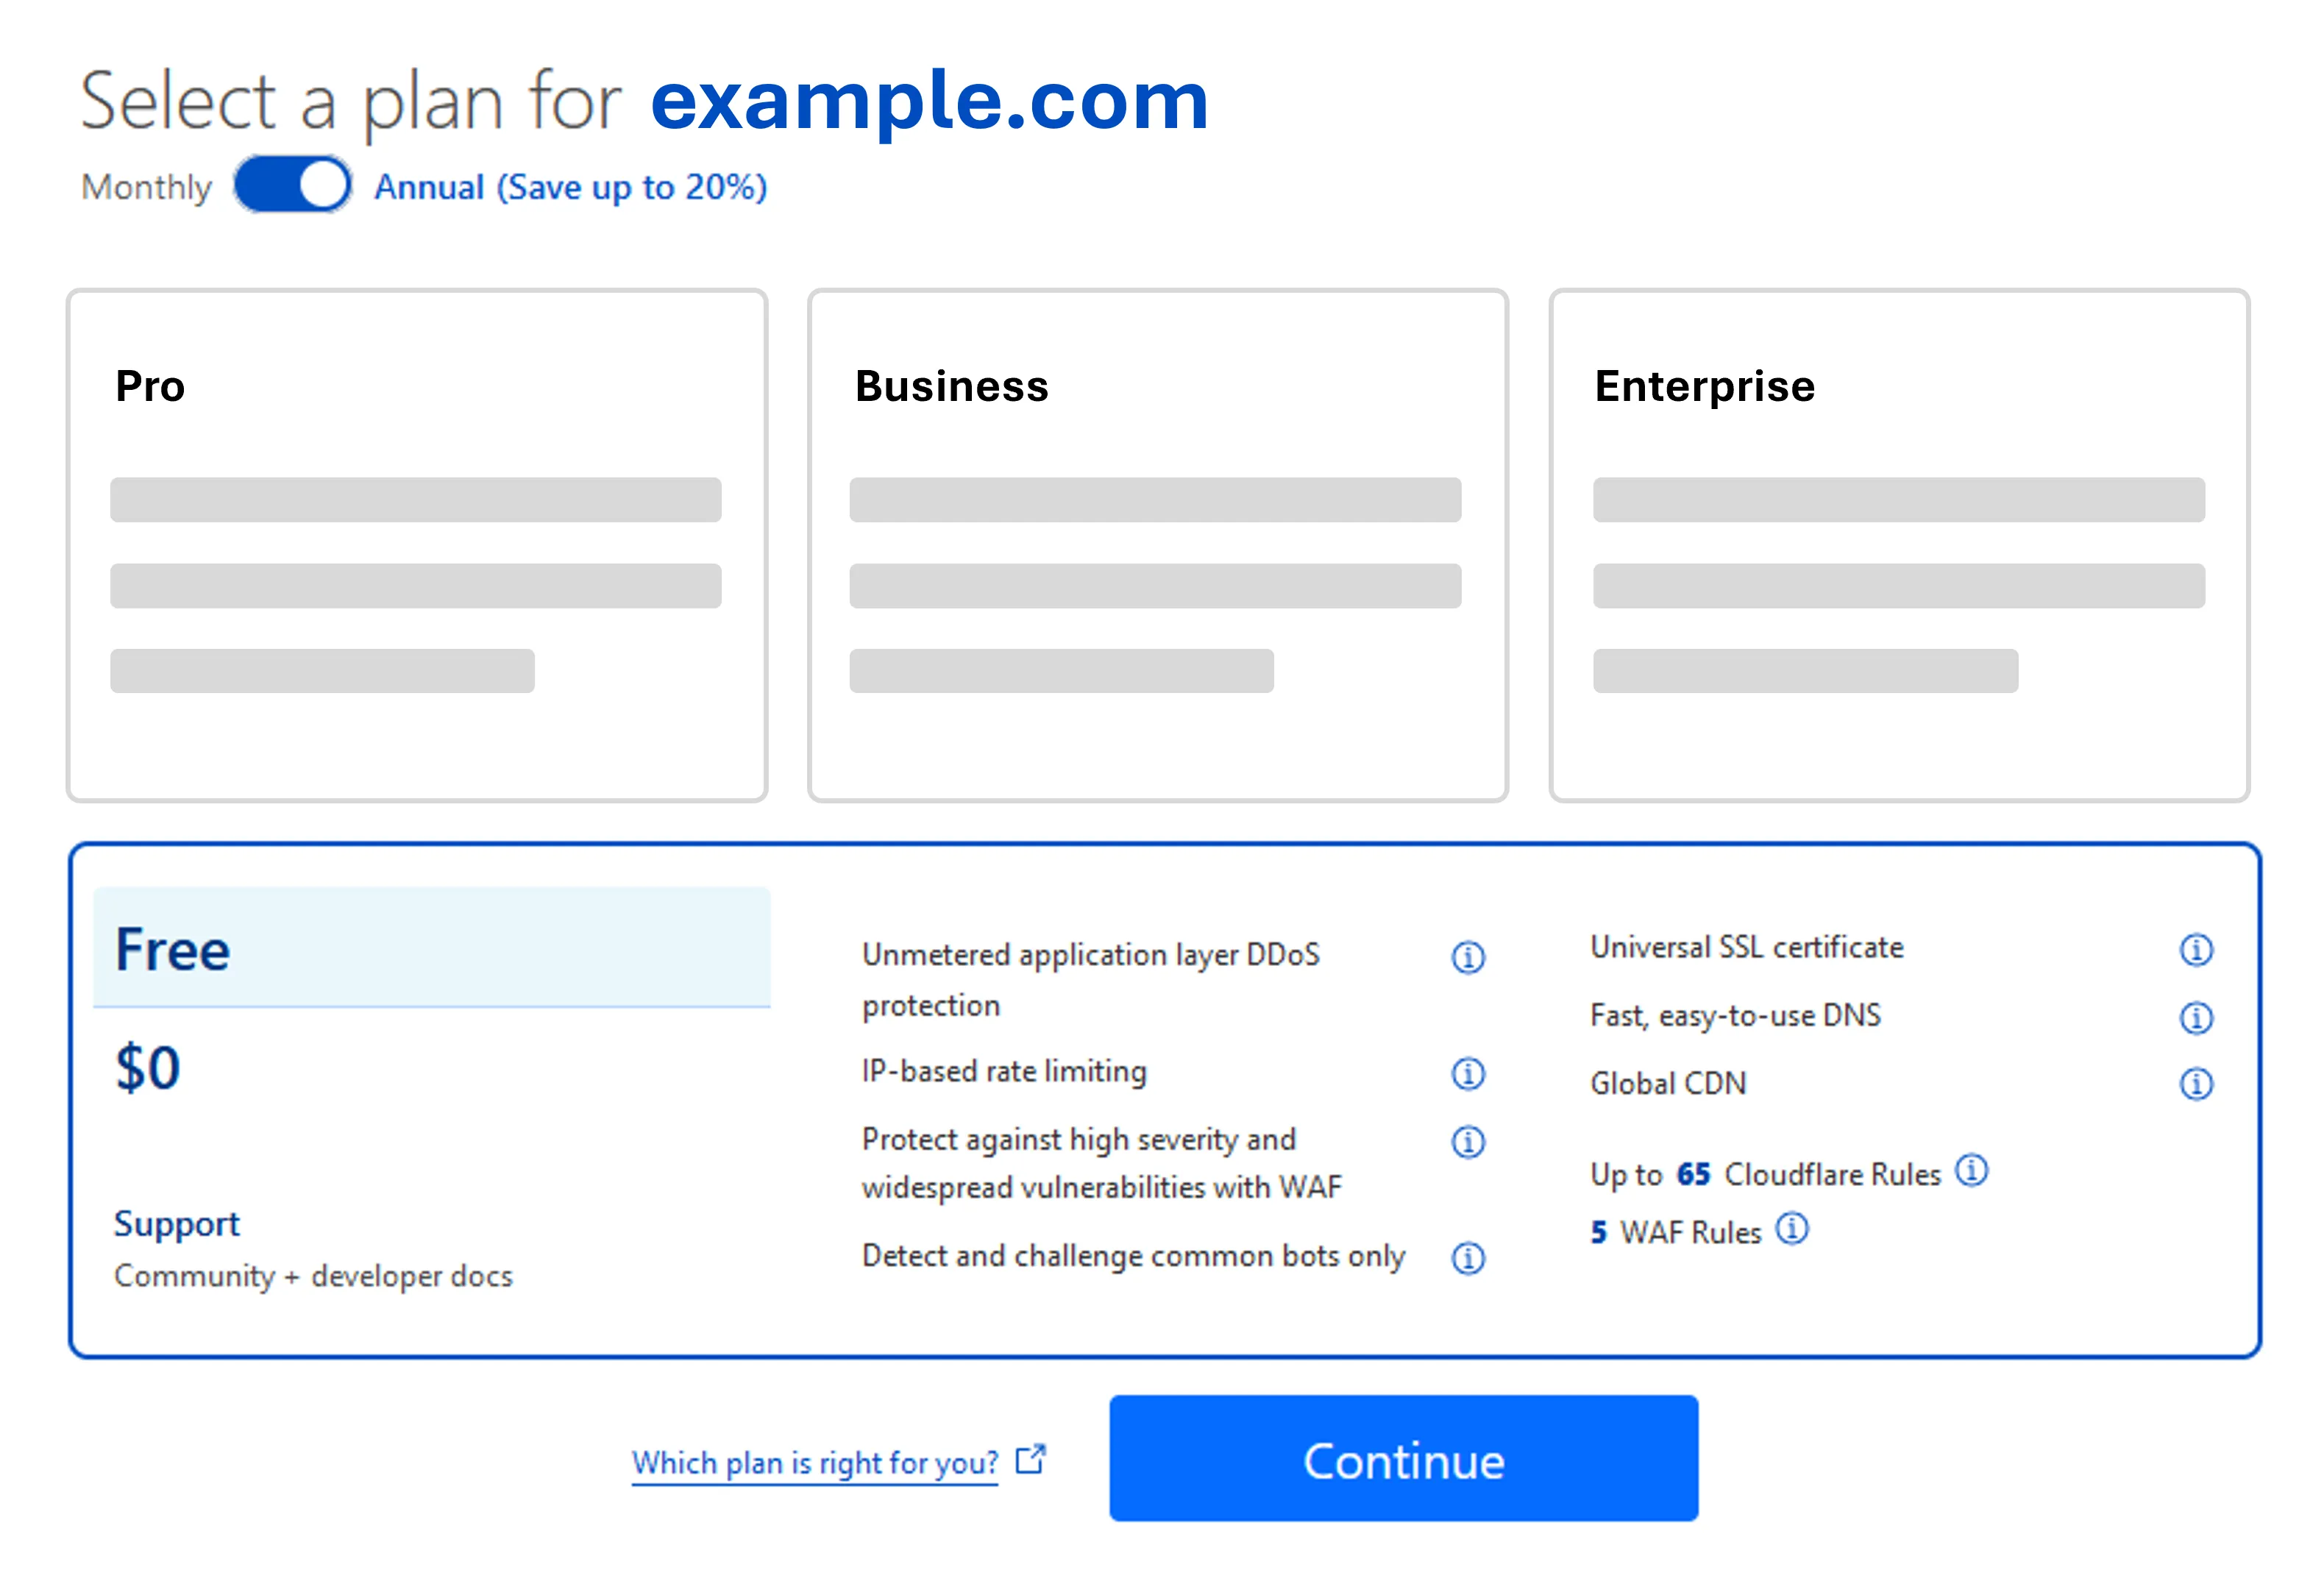
Cloudflare Plans - Check and verify the migrated DNS records
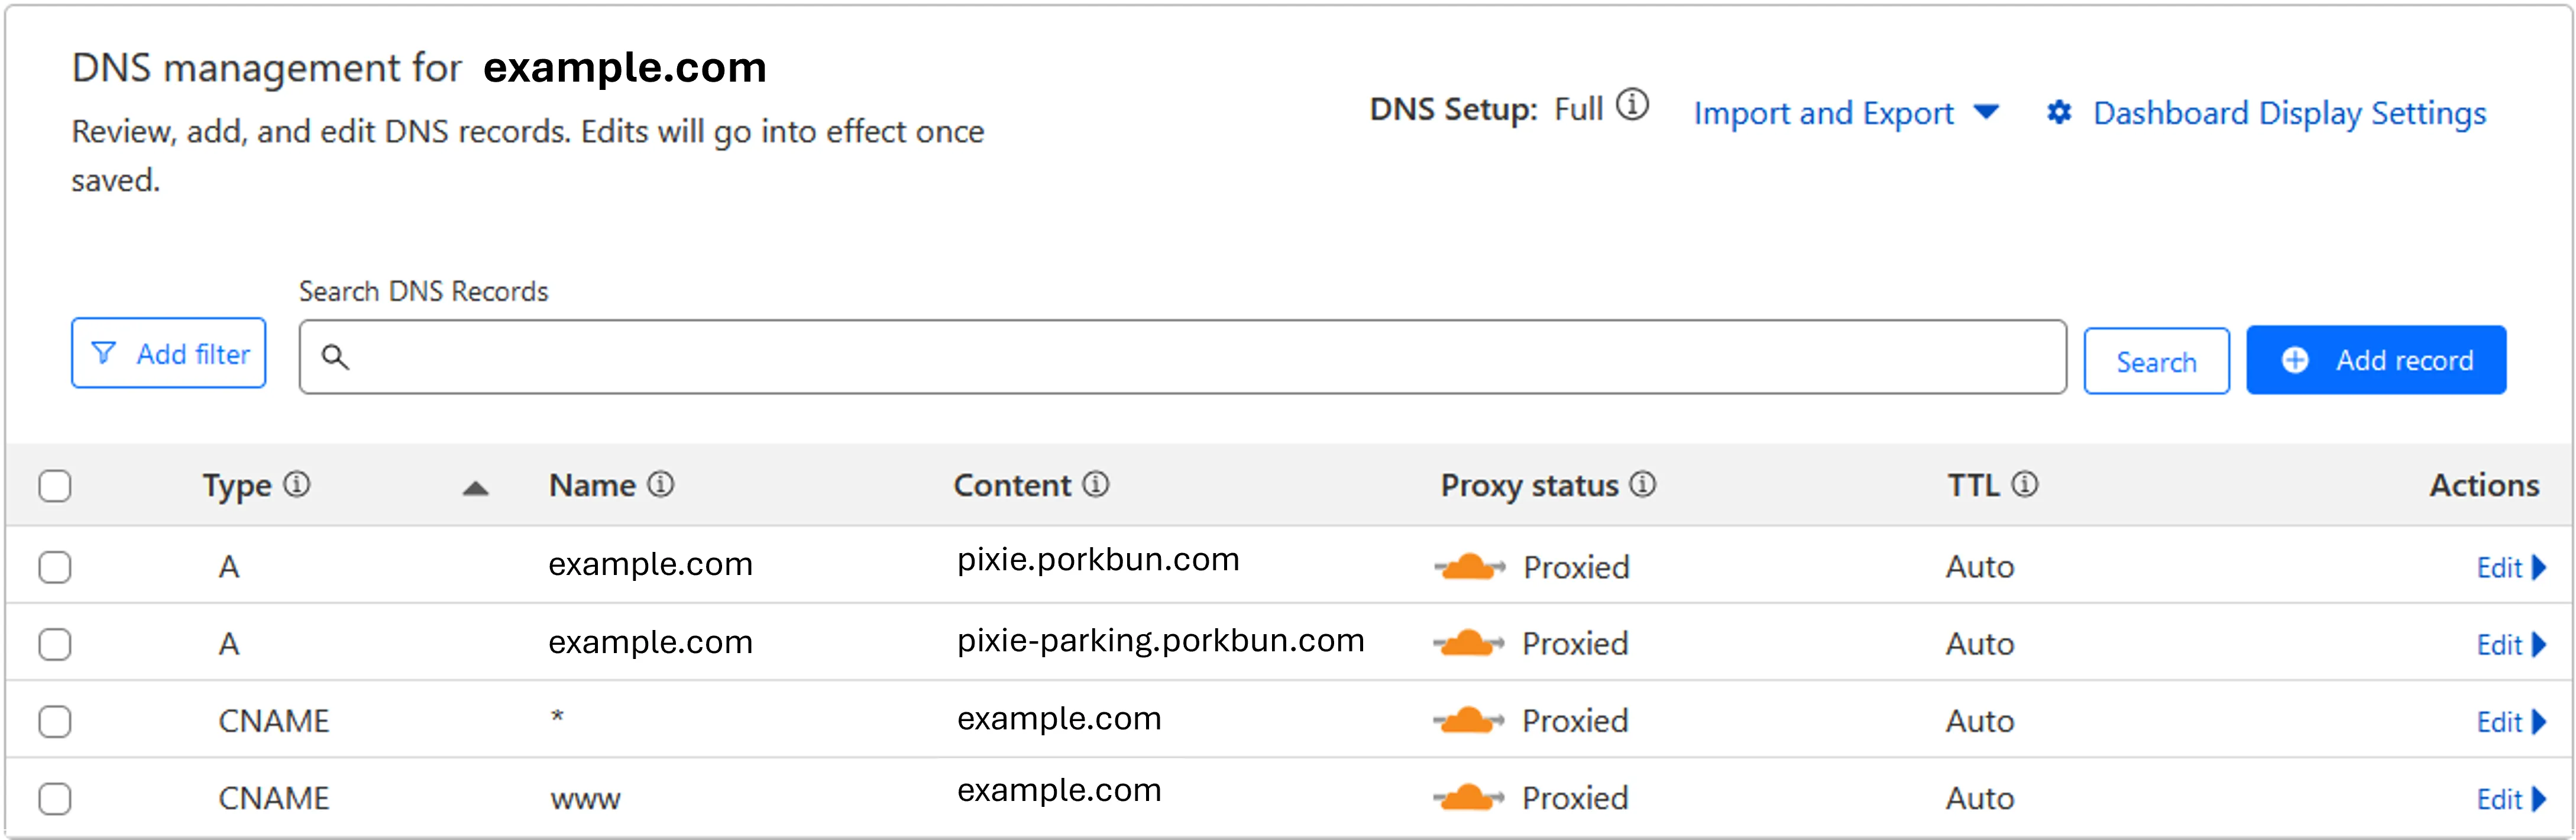
Cloudflare DNS Records - Copy Cloudflare nameservers (NS)
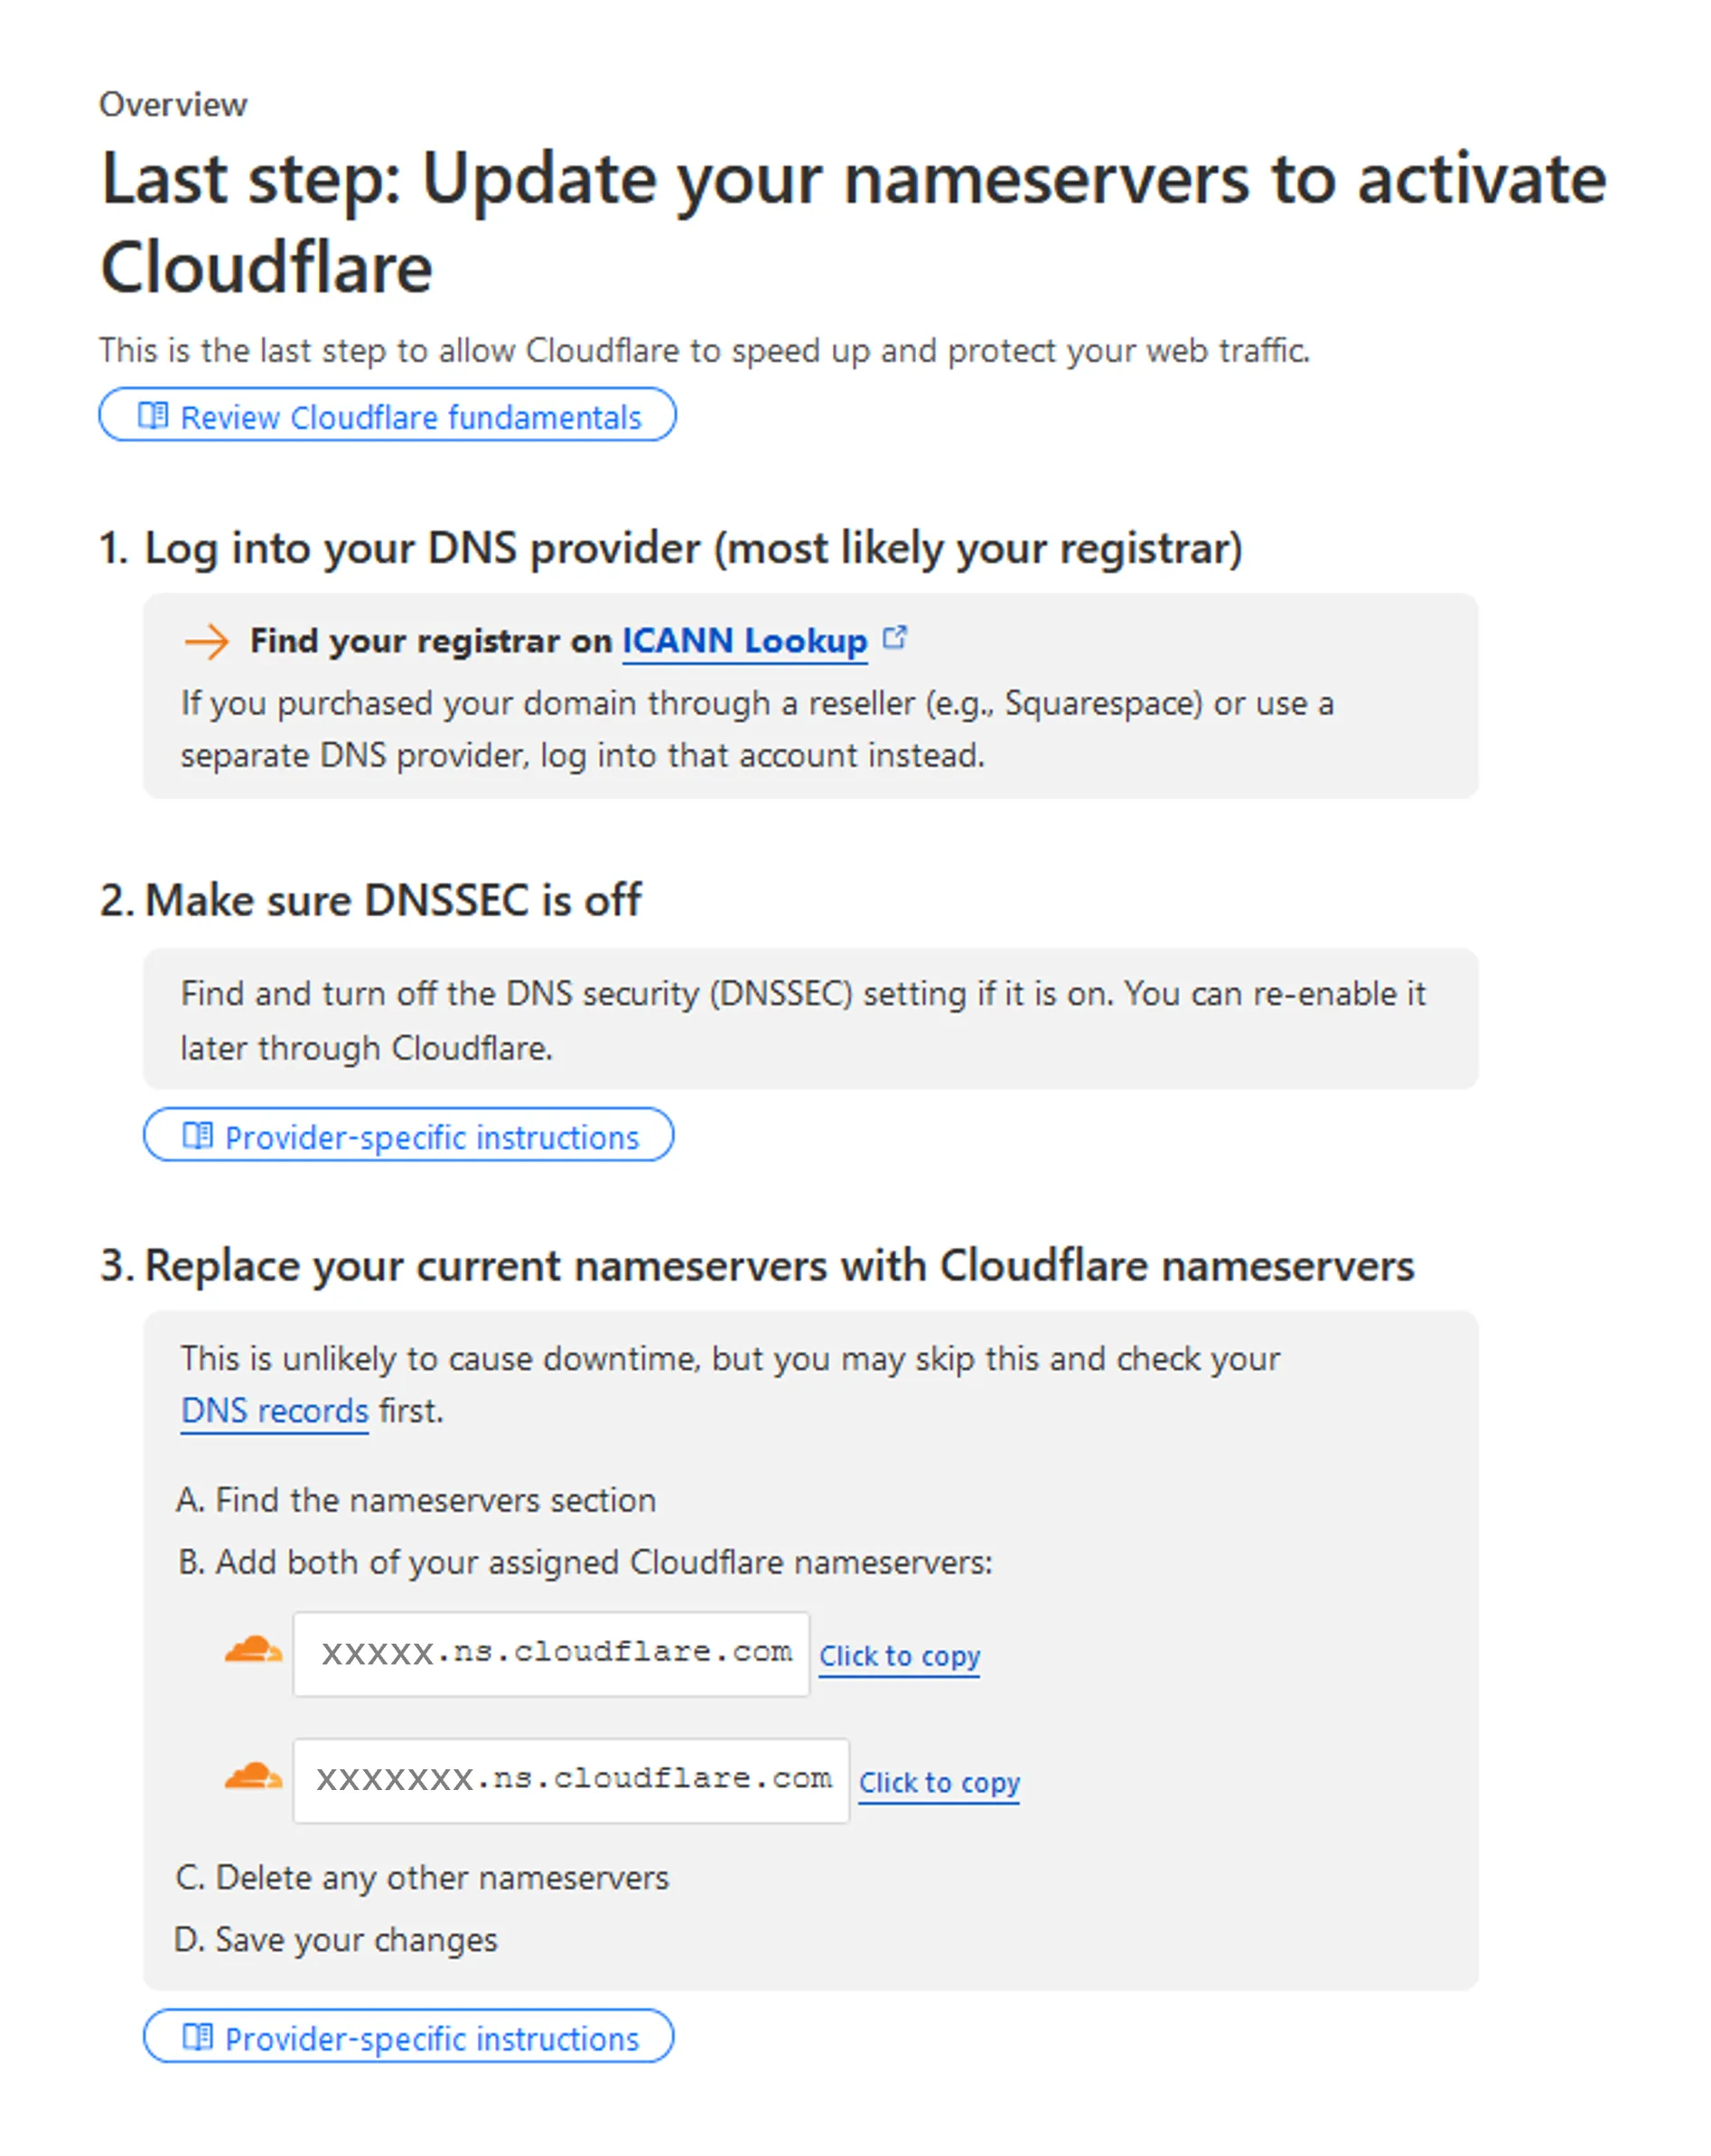
Cloudflare NS - Swap existing Porkbun’s NS to Cloudflare’s
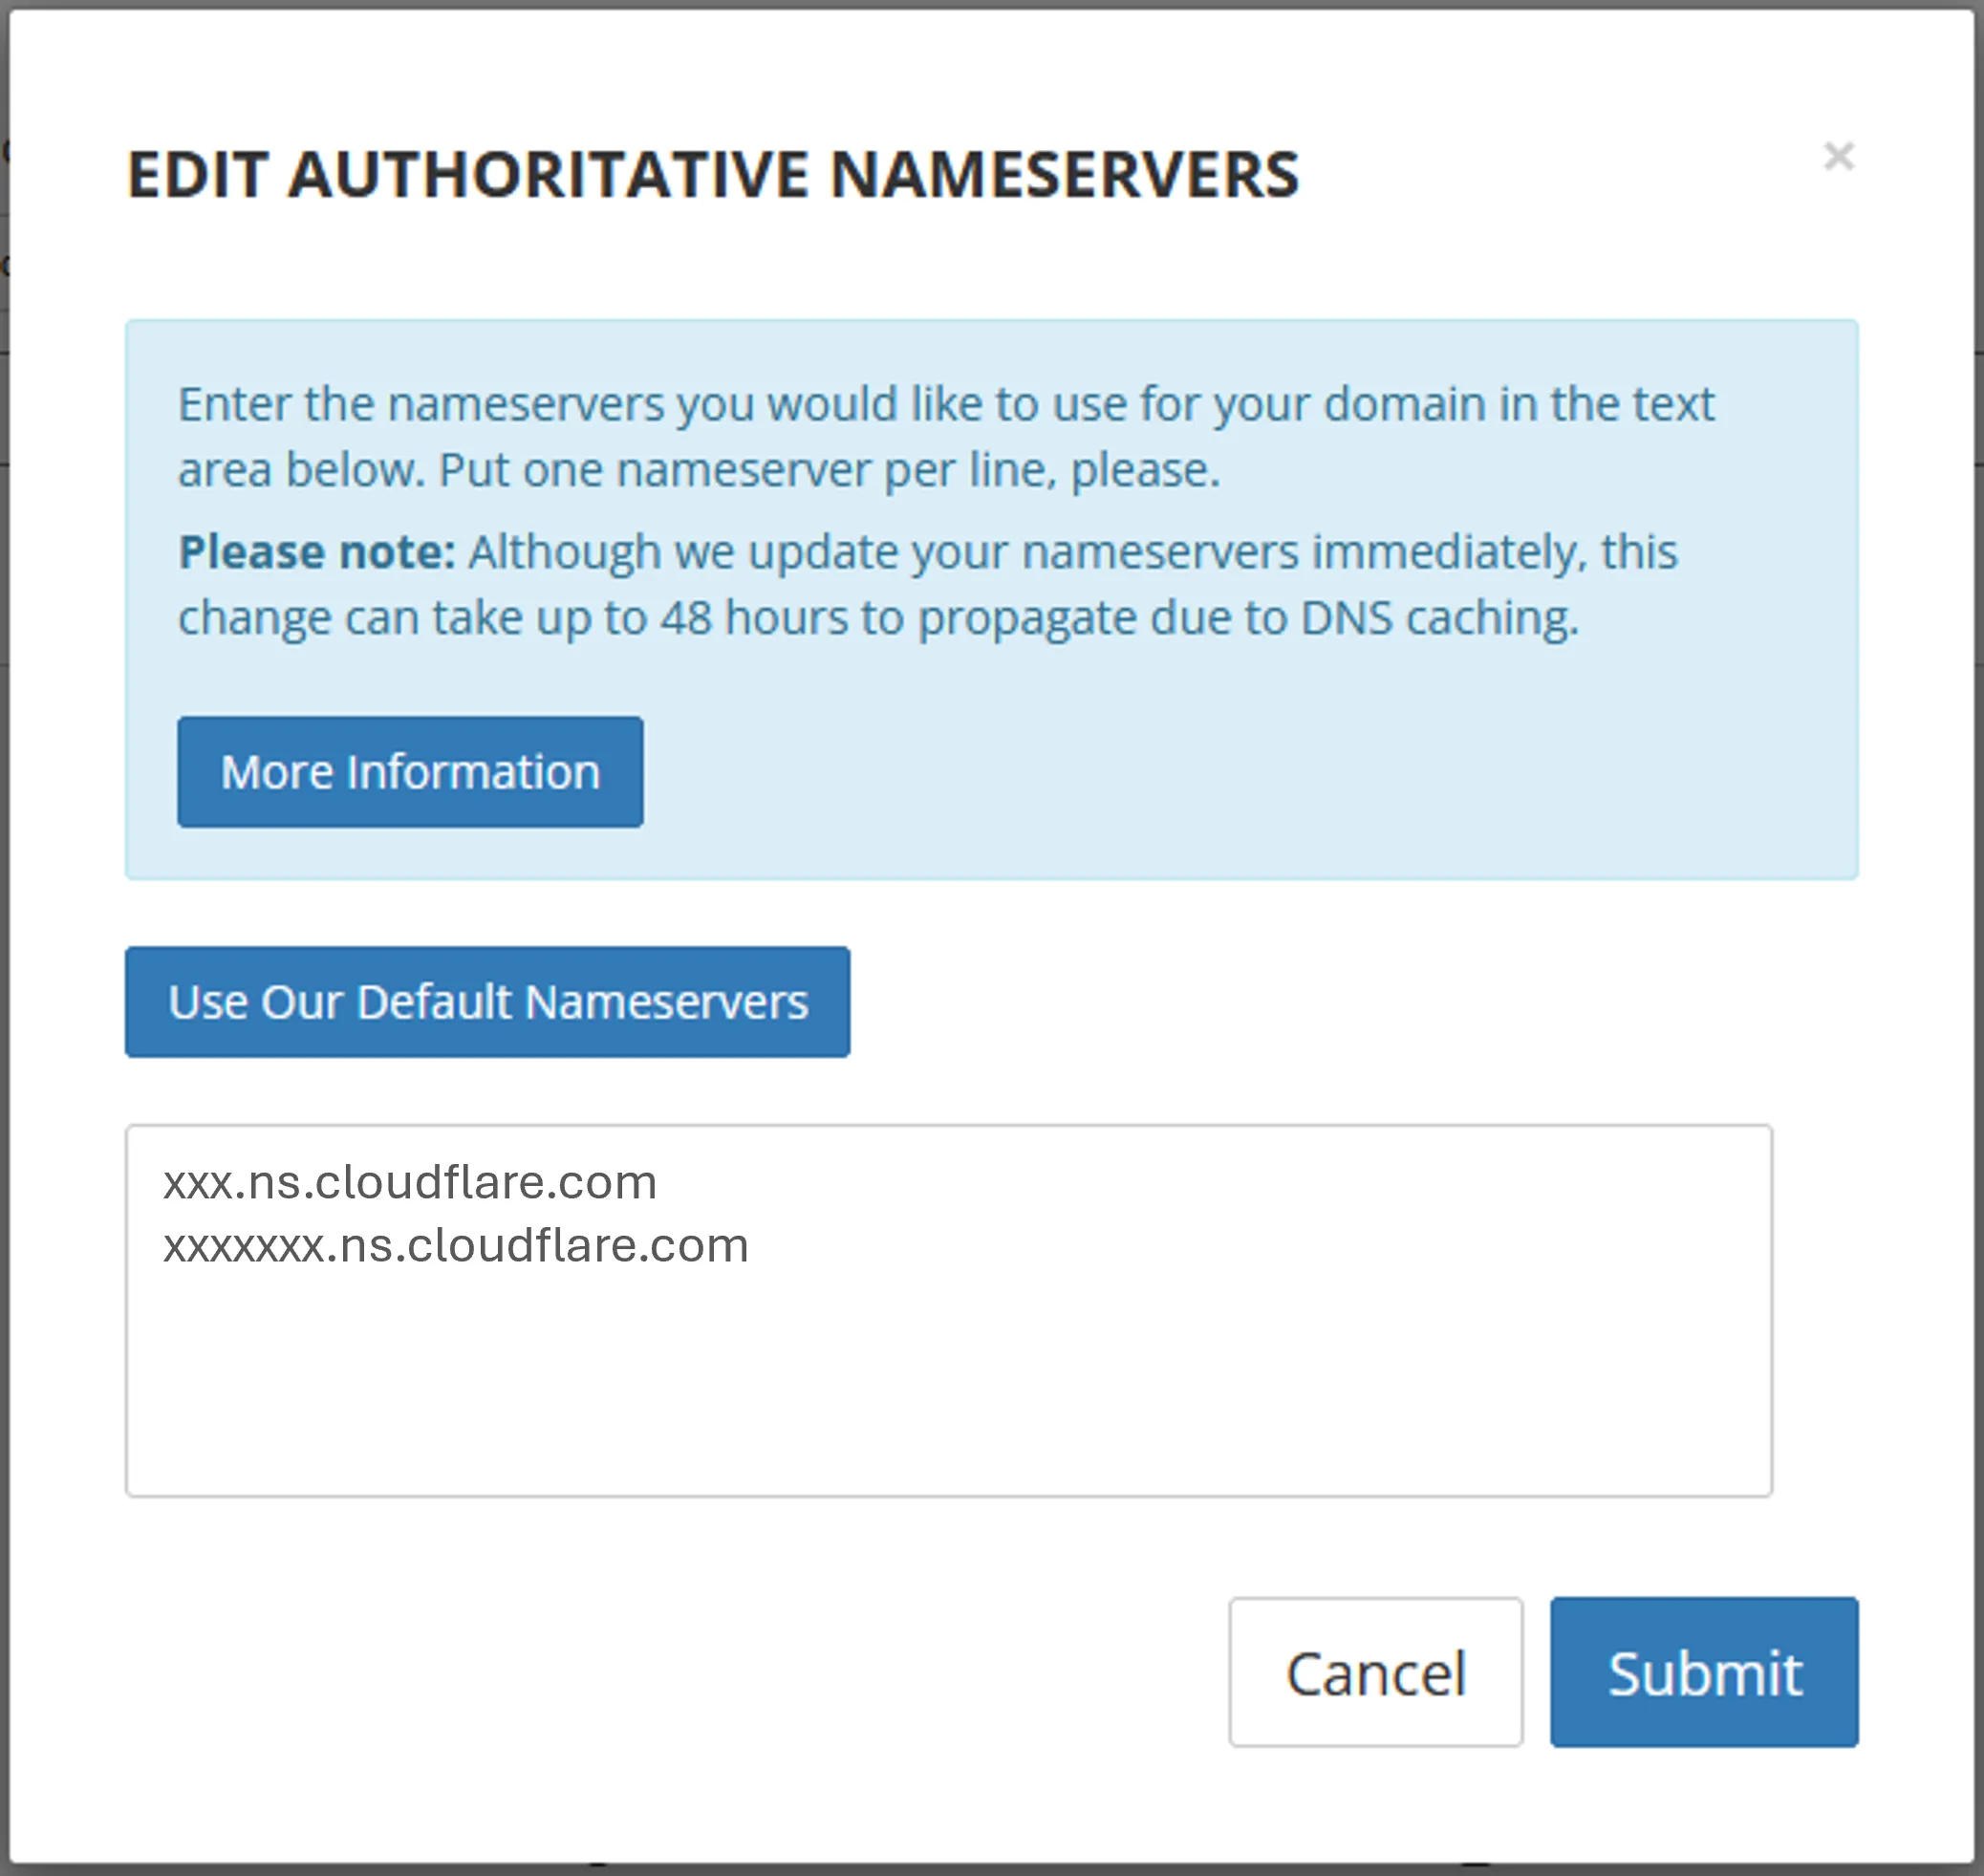
Porkbun NS Configure Cloudflare for better security and site optimization.
Security
- Navigate to “SSL/TLS > Overview”, set encryption mode to Full (Strict)
- Navigate to “SSL/TLS > Edge Certificates”, enable “Always Use HTTPS”
CDN / Caching
- Navigate to “Caching > Cache Rules”, select “Create rule”
- Select “Cache Everything”, ideal fo static sites
- Set rule name, use default settings, and click “Deploy”
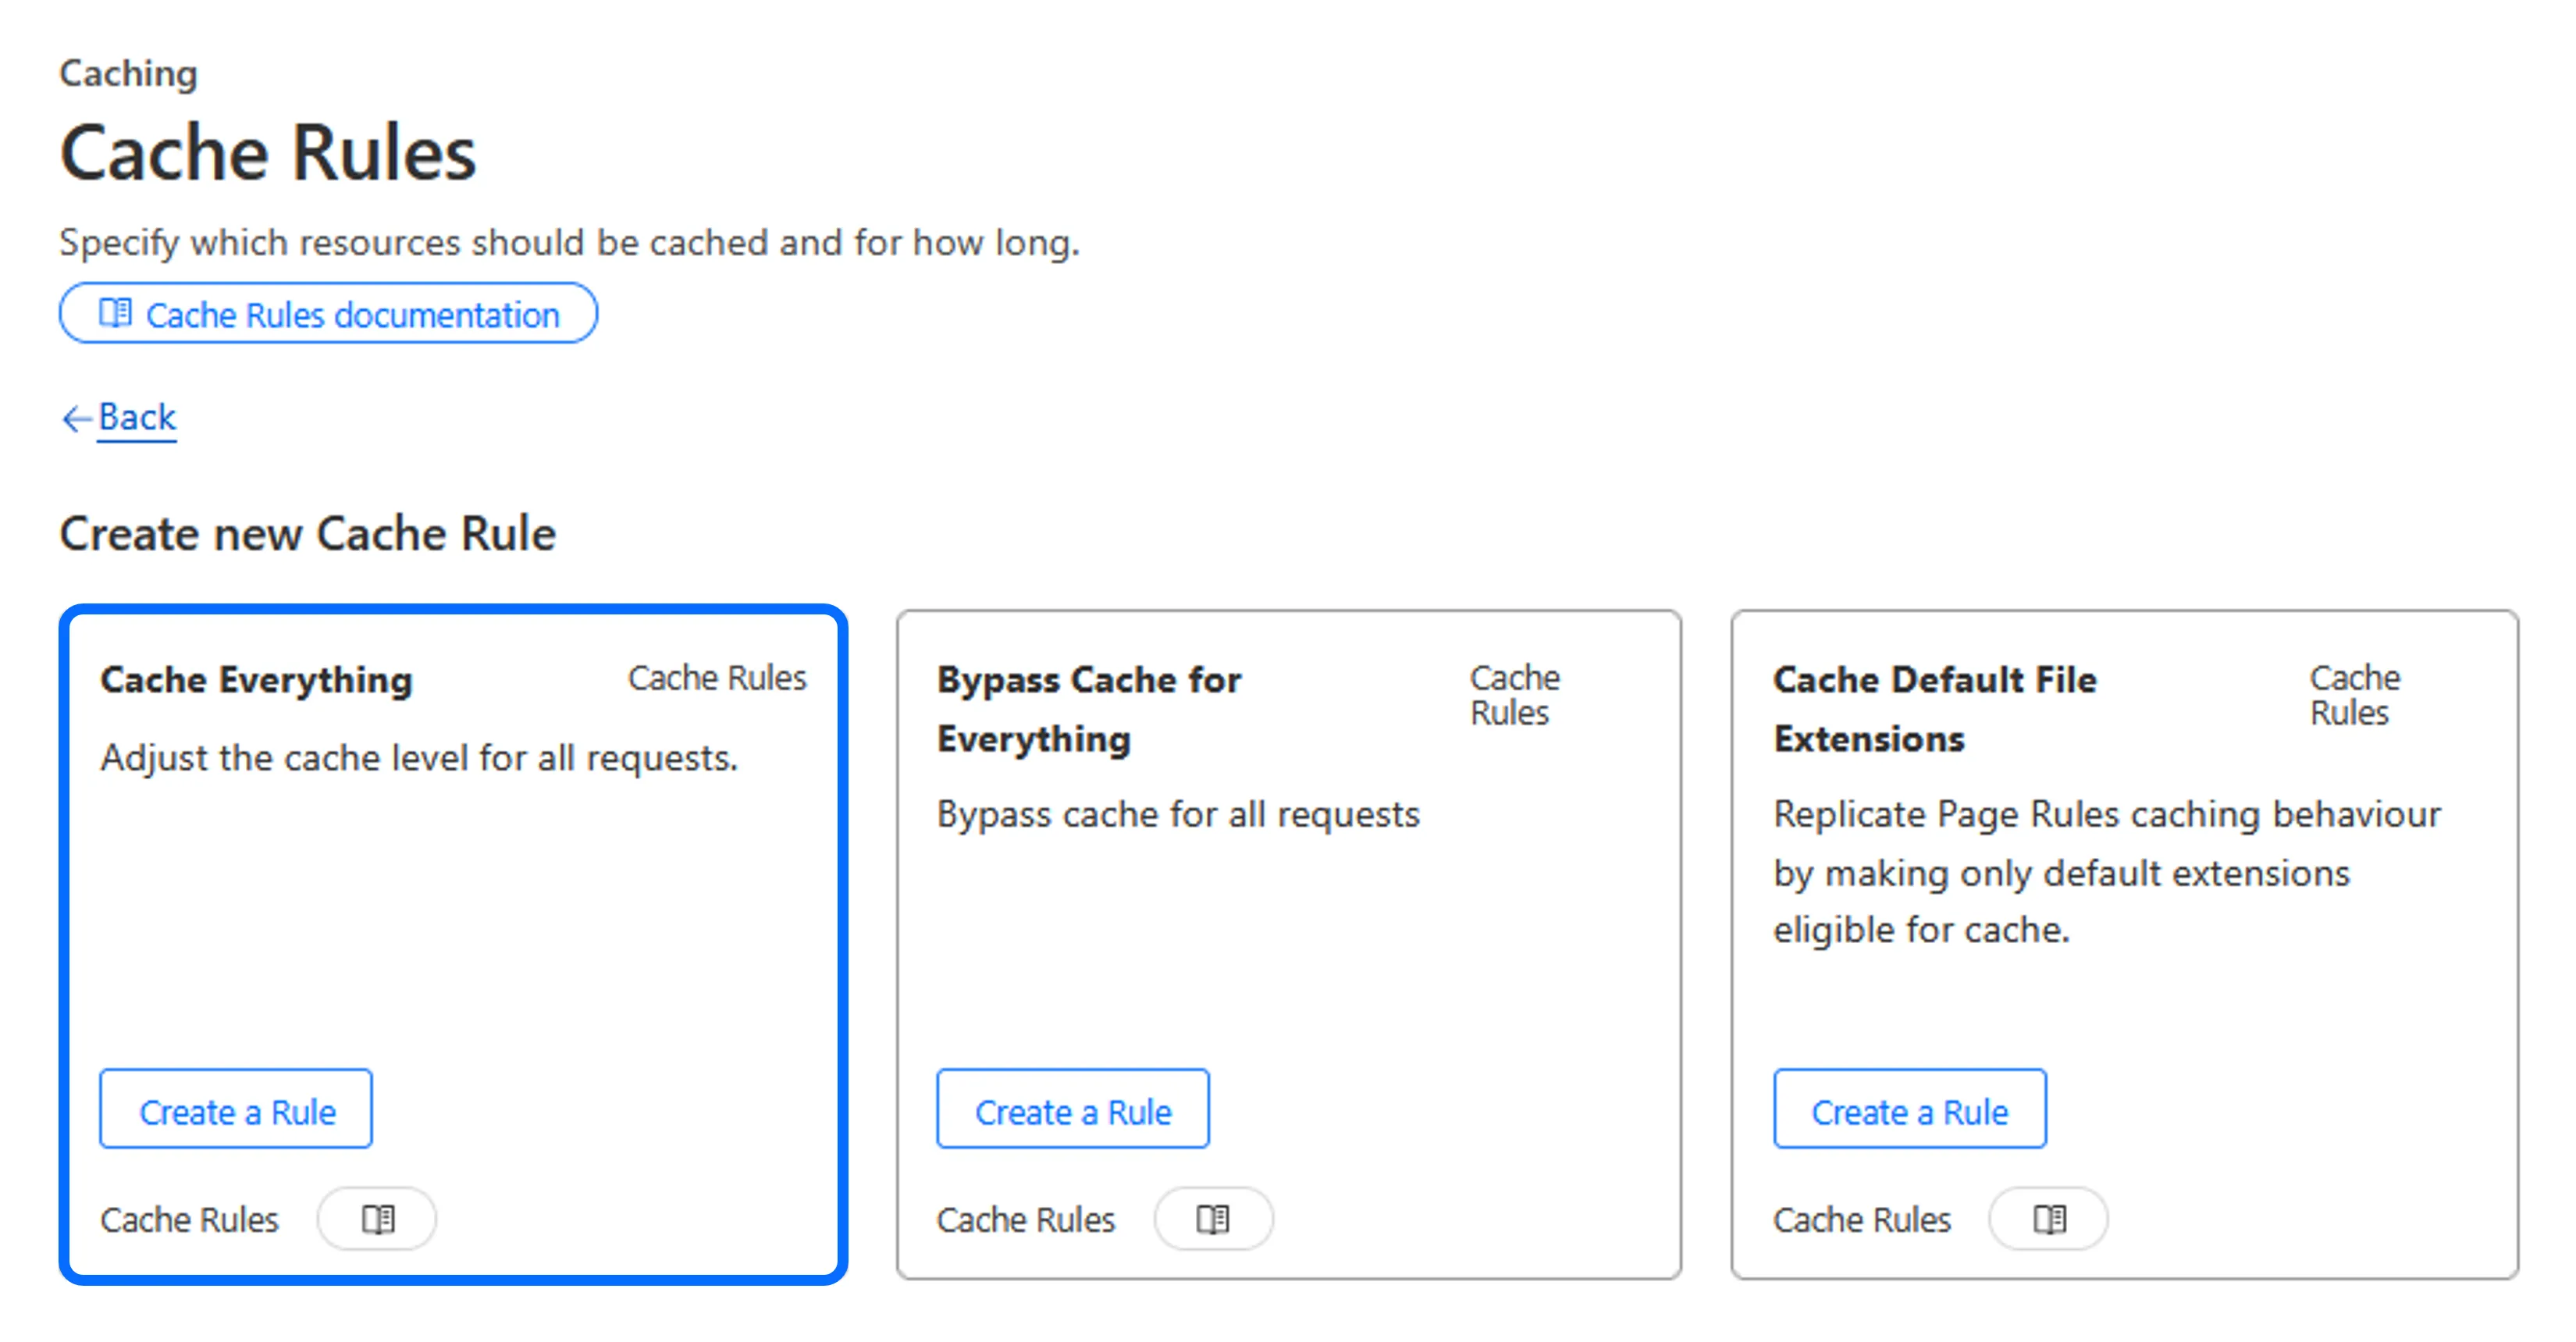
Cloudflare Caching
Step 2: Setting Up a Hetzner VPS
Register a Hetzner account.
Create a new project, navigate to “Servers” and click “Add Server”.
Utilize the following configurations as reference for server creation:
Location
- Falkenstein (eu-central)
Image
- Ubuntu 24.04
Type
- Shared vCPU
- x86 (Intel/AMD)
- CX22 (2 vCPUs, 4GB RAM, 40 GB SSD)
SSH Keys
Create an SSH key, one that has a passphrase for an added layer of security, with the following terminal command:
ssh-keygen -t ed25519 -C "Hetzner-Access" -f ~/.ssh/hetzner_accessCopy the contents of the public key (”~/.ssh/hetzner_access.pub”) and pass it into the SSH Keys section
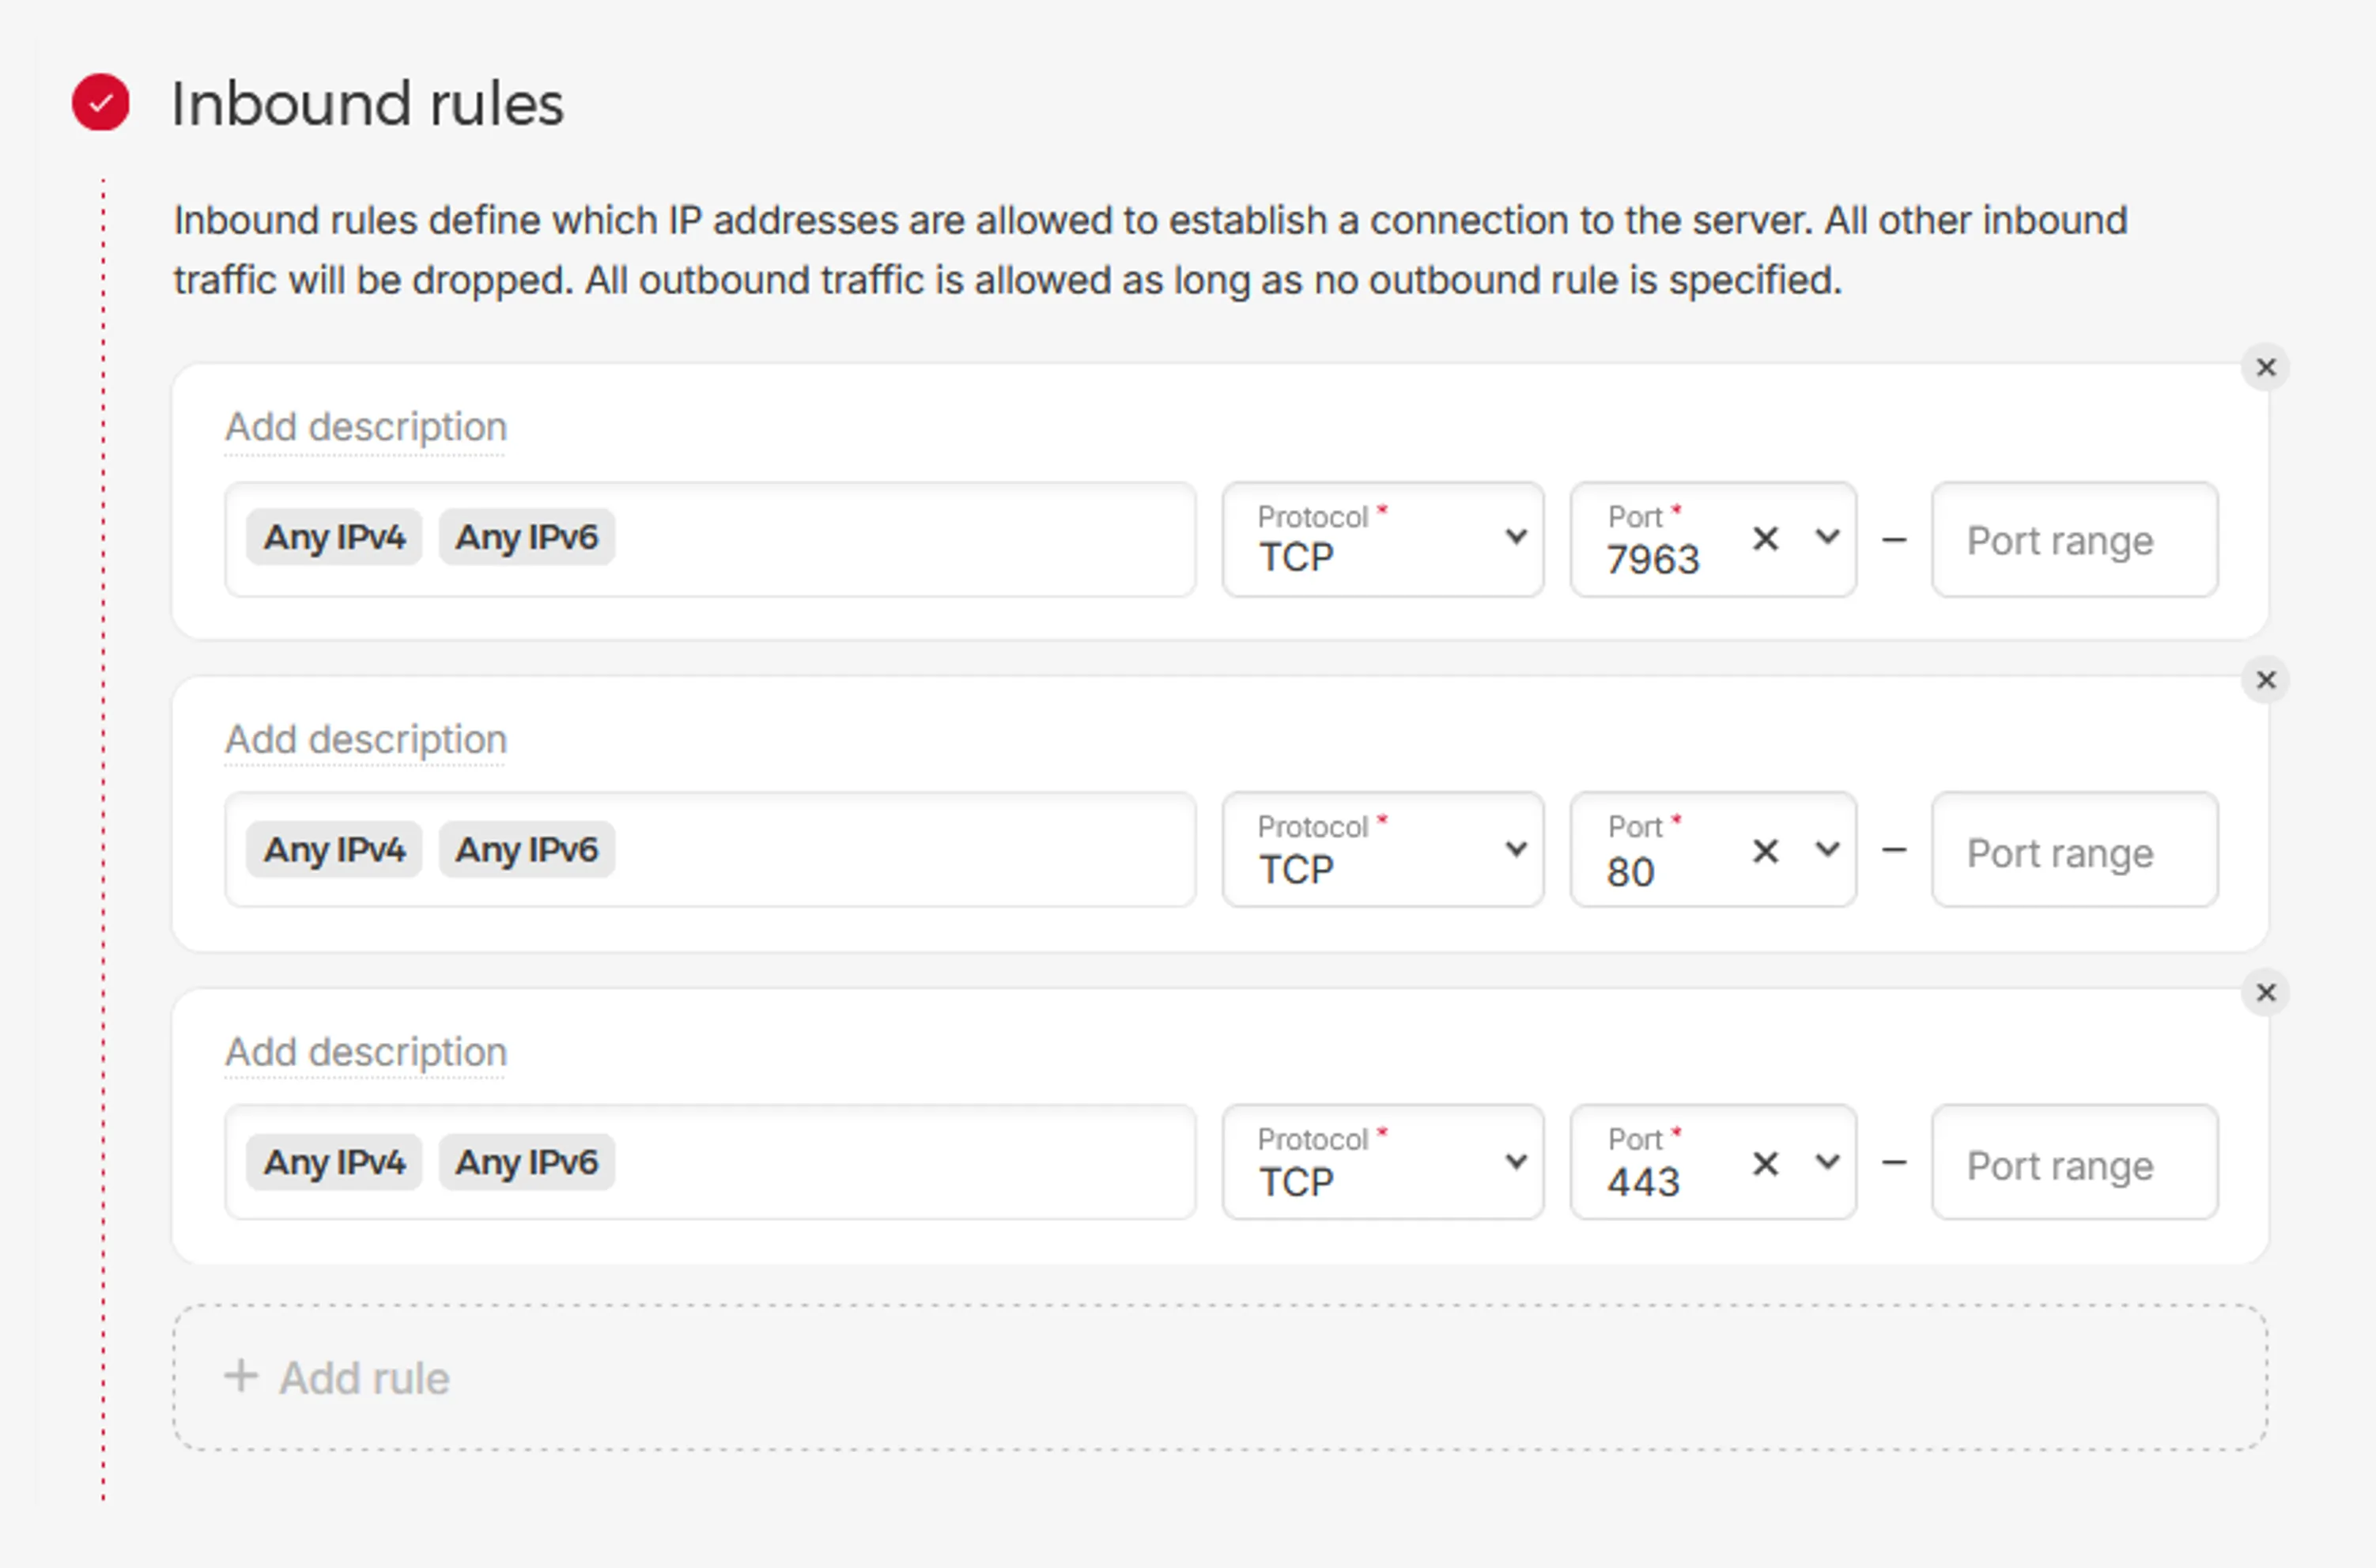
Firewalls
Create firewall rules with the following ports:
Port Description 7963 Custom SSH port 80 Standard port for HTTP connections 443 Standard port for HTTPS connections 3000 Temporary port to connect to Dokploy UI
Cloud Config
The following cloud-init script runs automatically when the server is created successfully, it has a couple of essential features:
- User creation with authorized public SSH keys
- Automatic security updates with minimal service distruption
- Hardened SSH with custom SSH port and configurations
- Strict firewall rules that only allows necessary ports
- Fail2Ban installation to protect against brute-force attacks
- Blocked ICMP Echo Requests to hide from ping scans
- Dokploy installation with root access
#cloud-config
users:
  - name: johndoe
    groups: users, admin
    sudo: ALL=(ALL) NOPASSWD:ALL
    shell: /bin/bash
    ssh_authorized_keys:
      - <public_ssh_key>

packages:
  - fail2ban
  - ufw
  - unattended-upgrades
  - apt-listchanges

package_update: true
package_upgrade: true

write_files:
  - path: /etc/apt/apt.conf.d/20auto-upgrades
    content: |
      APT::Periodic::Update-Package-Lists "1";
      APT::Periodic::Unattended-Upgrade "1";
      APT::Periodic::Download-Upgradeable-Packages "1";
      APT::Periodic::AutocleanInterval "7";

  - path: /etc/apt/apt.conf.d/50unattended-upgrades
    content: |
      Unattended-Upgrade::Automatic-Reboot "true";
      Unattended-Upgrade::Automatic-Reboot-Time "02:00";
      Unattended-Upgrade::Remove-Unused-Dependencies "true";
      Unattended-Upgrade::Automatic-Reboot-WithUsers "false";
      Unattended-Upgrade::Allowed-Origins {
          "${distro_id}:${distro_codename}";
          "${distro_id}:${distro_codename}-security";
          "${distro_id}ESMApps:${distro_codename}-apps-security";
          "${distro_id}ESM:${distro_codename}-infra-security";
      };
      Unattended-Upgrade::MinimalSteps "true";
      Unattended-Upgrade::SyslogEnable "true";
      Unattended-Upgrade::OnlyOnACPower "false";

runcmd:
  # Configure unattended-upgrades
  - systemctl enable unattended-upgrades
  - systemctl start unattended-upgrades

  # Install Dokploy BEFORE restricting root access
  - curl -sSL https://dokploy.com/install.sh | sh

  # Configure Fail2Ban
  - printf "[sshd]\nenabled = true\nbanaction = iptables-multiport" > /etc/fail2ban/jail.local
  - systemctl enable fail2ban

  # Harden SSH Configuration & Change SSH Port
  - sed -i -e '/^\(#\|\)PermitRootLogin/s/^.*$/PermitRootLogin no/' /etc/ssh/sshd_config
  - sed -i -e '/^\(#\|\)PasswordAuthentication/s/^.*$/PasswordAuthentication no/' /etc/ssh/sshd_config
  - sed -i -e '/^\(#\|\)KbdInteractiveAuthentication/s/^.*$/KbdInteractiveAuthentication no/' /etc/ssh/sshd_config
  - sed -i -e '/^\(#\|\)ChallengeResponseAuthentication/s/^.*$/ChallengeResponseAuthentication no/' /etc/ssh/sshd_config
  - sed -i -e '/^\(#\|\)MaxAuthTries/s/^.*$/MaxAuthTries 2/' /etc/ssh/sshd_config
  - sed -i -e '/^\(#\|\)AllowTcpForwarding/s/^.*$/AllowTcpForwarding no/' /etc/ssh/sshd_config
  - sed -i -e '/^\(#\|\)X11Forwarding/s/^.*$/X11Forwarding no/' /etc/ssh/sshd_config
  - sed -i -e '/^\(#\|\)AllowAgentForwarding/s/^.*$/AllowAgentForwarding no/' /etc/ssh/sshd_config
  - sed -i -e '/^\(#\|\)AuthorizedKeysFile/s/^.*$/AuthorizedKeysFile .ssh\/authorized_keys/' /etc/ssh/sshd_config
  - sed -i 's/^#\?Port 22/Port 7963/' /etc/ssh/sshd_config
  - sed -i '$a AllowUsers johndoe' /etc/ssh/sshd_config

  # Configure Firewall (UFW)
  - ufw default deny incoming
  - ufw default allow outgoing
  - ufw allow 7963/tcp  # Allow SSH on new port
  - ufw allow 80/tcp   # Allow HTTP for web access
  - ufw allow 443/tcp  # Allow HTTPS for secure web access
  - ufw allow 3000/tcp # Allow Dokploy web interface
  - sed -i '/# ok icmp codes for INPUT/a -A ufw-before-input -p icmp --icmp-type echo-request -j DROP' /etc/ufw/before.rules
  - ufw --force enable

  # Restart Services
  - systemctl restart sshd
  - ufw reload

  # Final reboot
  - reboot
In the event that cloud-init script is not supported by your preferred VPS provider, here is an alternative with a simple bash script that can be executed by any Linux distro:
# METHOD 1 - Save to local file and run
curl -O https://gist.githubusercontent.com/JackLeeJM/3b30f9b2af1f7c0c86a34864f3cc082e/raw/cloud-config.sh
chmod +x cloud-config.sh
sudo ./cloud-config.sh your-username "your-ssh-public-key" 7963

# METHOD 2 - One-liner with direct execution from pipe
curl -sSL https://gist.githubusercontent.com/JackLeeJM/3b30f9b2af1f7c0c86a34864f3cc082e/raw/cloud-config.sh | bash -s -- your-username "your-ssh-public-key" 7963
Click “Create & Buy now” after finalizing the server name.
Wait about 5 to 10 minutes for the server’s cloud-config setup to complete.
Step 3: Setting Up Dokploy
- Access to Dokploy UI with “http://your-hetzner-server-ip:3000” and register an account with dummy credentials.
- Navigate to “Settings > Web Server” from the left panel, and fill in the Domain field with a subdomain address of your purchased domain.
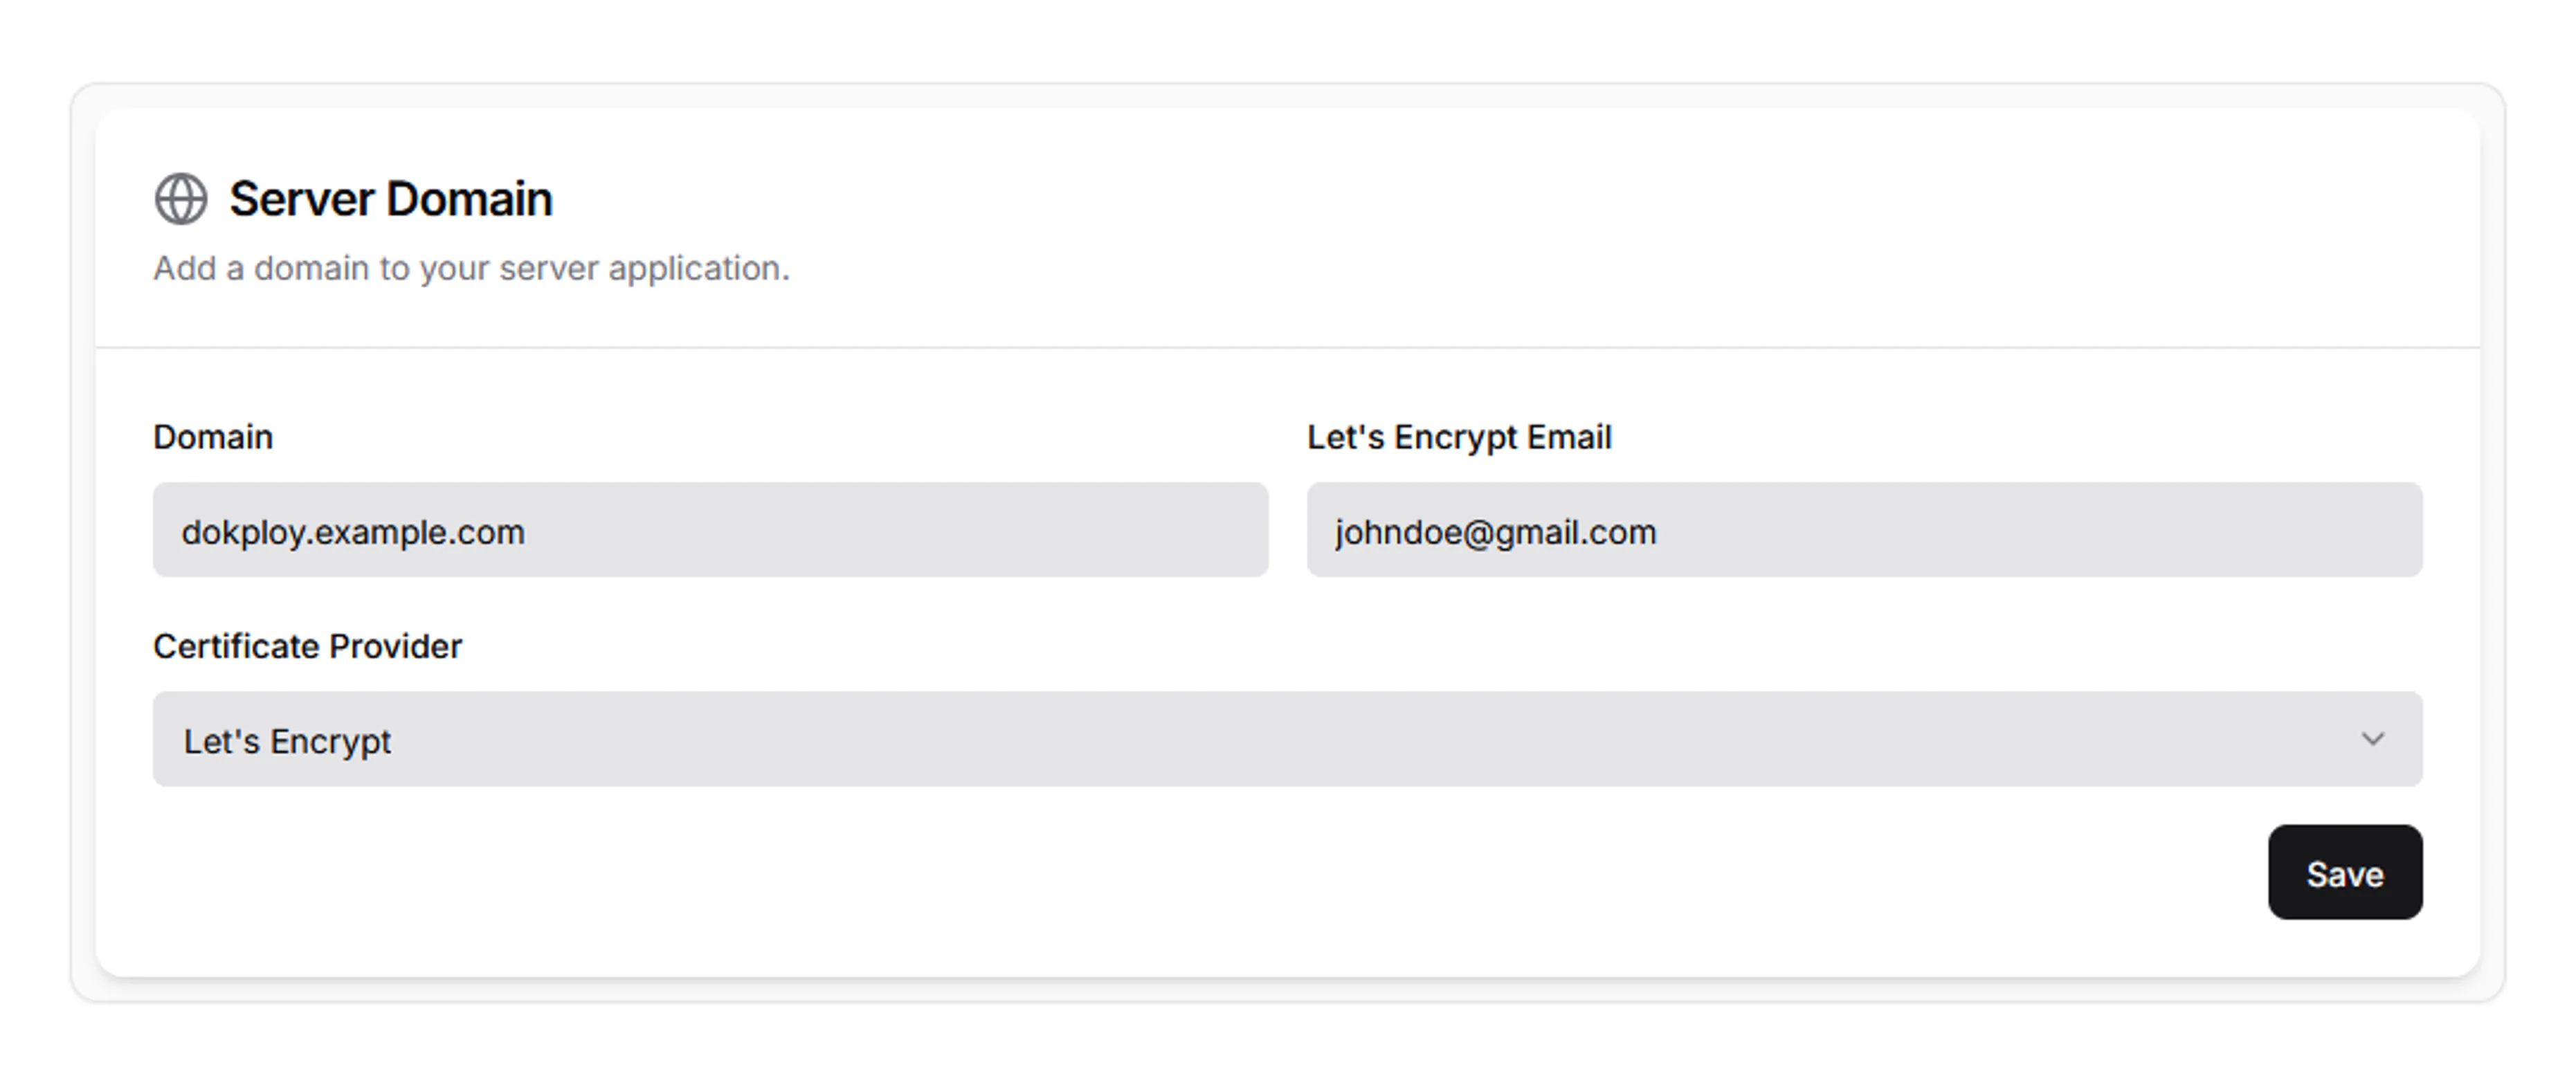
Dokploy Server Domain - Go to Cloudflare’s dashboard, select the domain you have registered earlier, navigate to DNS and change the records by assigning the Hetzner VPS IP address to the main domain, as well as the subdomain to manage the Dokploy application.
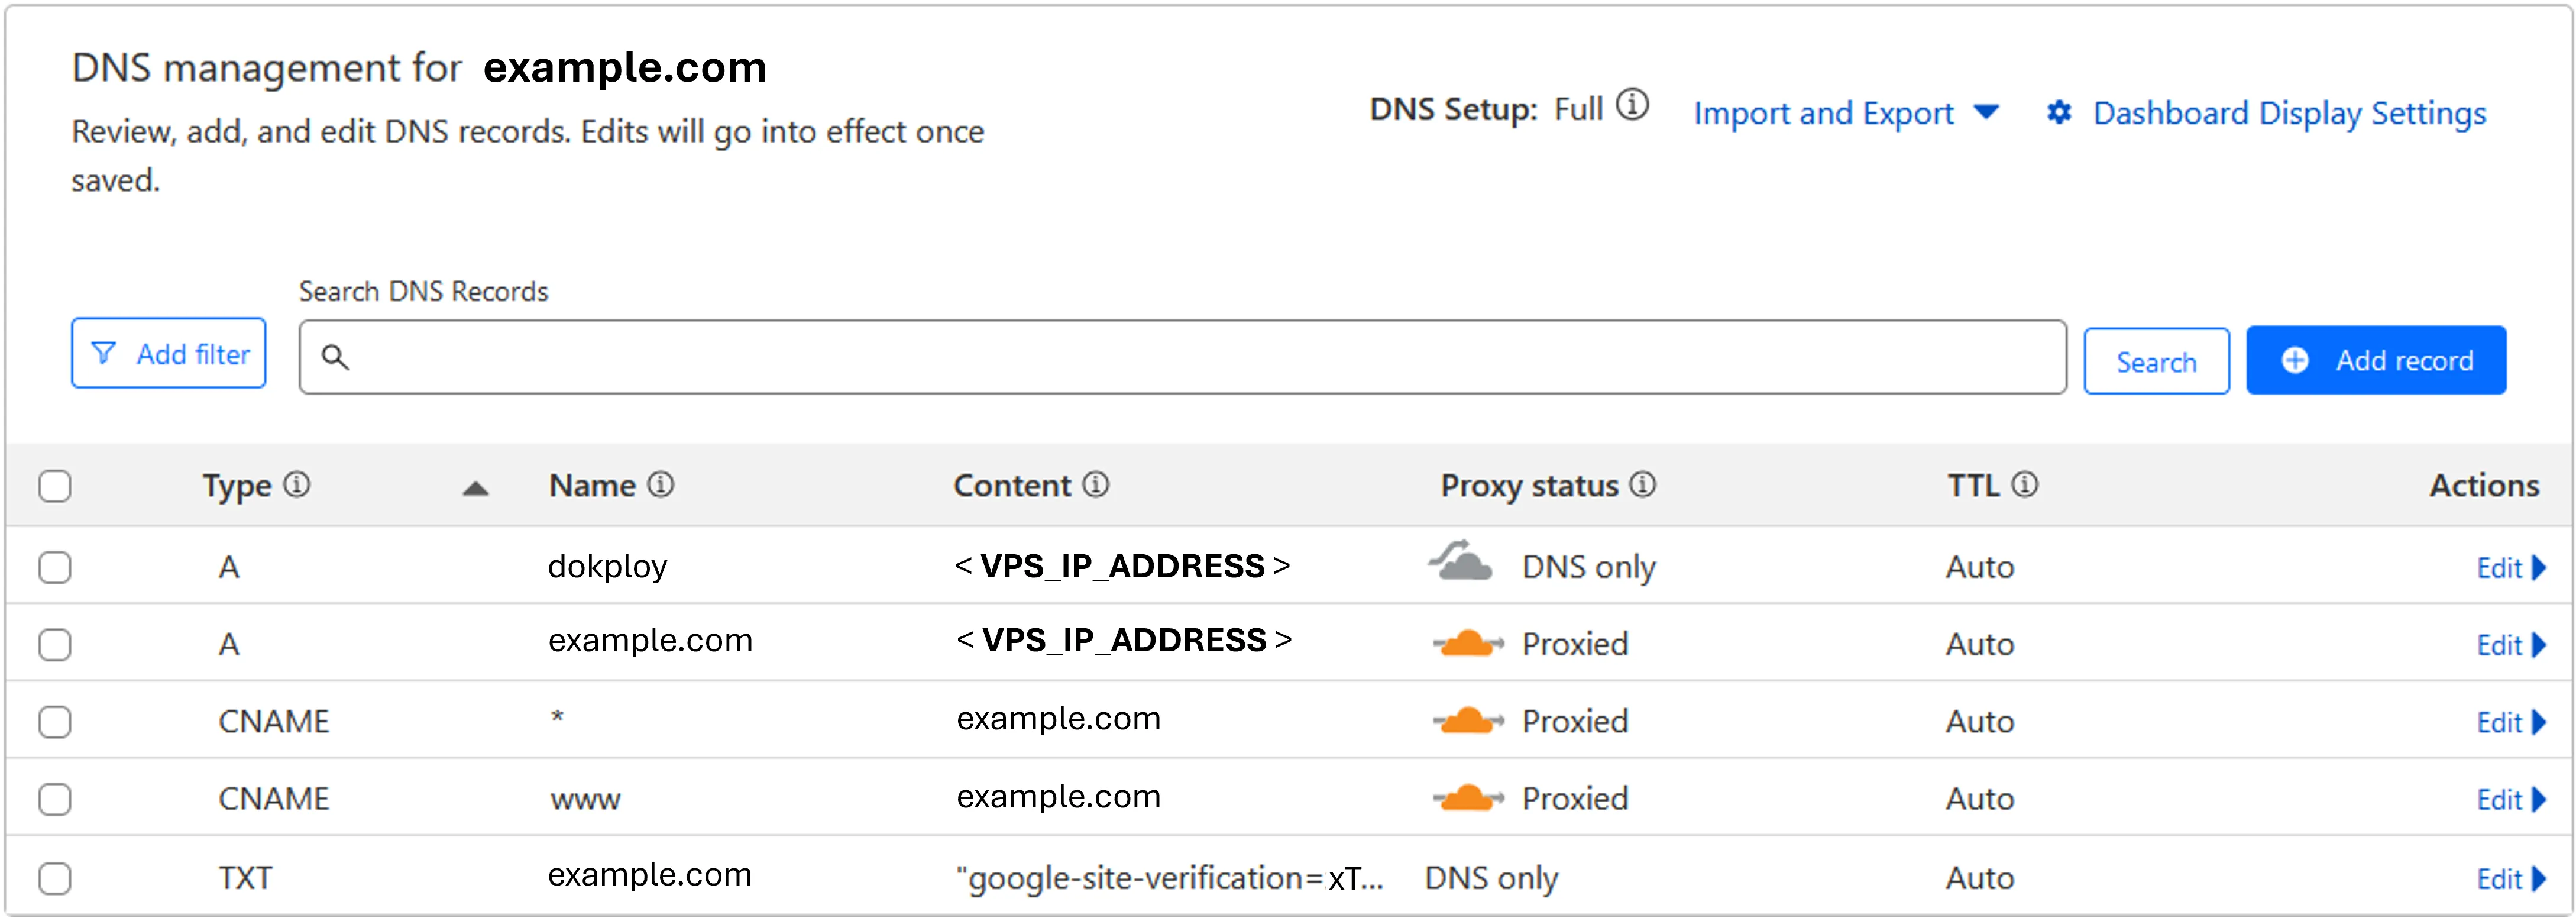
Cloudflare DNS Records - Final - Now that the Dokploy app is properly secured with HTTPS through Cloudflare, we can proceed to change the credentials. Navigate to “Settings > Profile”, change to a much stronger password (BitWarden) and enable 2FA (Microsoft Authenticator) to add an additional layer of security.
- While still in the Profile tab, generate a token to access the API/CLI, this will be used in Step 4.
- Navigate to “Home > Projects”, create a project, then create a service for “Application”.
- Since the Dokploy app is accessible via “https://dokploy.example.com”, we can now remove the temporary firewall rule of port 3000 in both Hetzner Firewall and UFW.
Navigate to Hetzner console’s Firewall page and remove the inbound rules for Port 3000
Hetzner Firewall Rules SSH into Hetzner VPS via terminal and remove Port 3000 from UFW rulesets
# Login to VPS
ssh -i ~/.ssh/hetzner_access johndoe@your_vps_ip_address -p 7963

# Removes firewall rule and restart UFW service
sudo ufw delete allow 3000/tcp
sudo ufw reload
Step 4: Setting Up GitHub Container Registry
The example web application that we will be demonstrating in this tutorial is Astroplate, an open-source Astro project, with a convenient Dockerfile to boot.
Clone the GitHub repository
git clone https://github.com/zeon-studio/astroplate.gitPublish the repository to GitHub, and navigate to “Settings > Security > Actions” to add the necessary secrets that will be used by the GitHub Action workflows.
DOKPLOY_AUTH_TOKEN
Retrieve the generated token from Step 3’s Item No. 5, where it is found in the Dokploy UI’s Profile tab.
DOKPLOY_APPLICATION_ID
The application_id can be determine via a curl command or the Dokploy UI
# Curl command
# Outputs a JSON object that lists all projects and services
# Eyeball the output to identify the application_id
curl -X 'GET' \
  'https://dokploy.example.com/api/project.all' \
  -H 'accept: application/json'
  -H 'Authorization: Bearer <DOKPLOY_AUTH_TOKEN>'

# Dokploy UI
1. Navigate to "Home > Projects".
2. Select the project you have created.
3. Select the service application you have created.
4. Check the web address URL, which should look like:
   "https://dokploy.example.com/dashboard/project/<project_id>/services/application/<application_id>"
5. Copy the application_id directly from URL.
DOKPLOY_URL
The Dokploy UI dashboard URL without the trailing backslash - “https://dokploy.example.com”
Create a folder structure of
.github/workflowsin the project directory, then create a YAML file calledpublish-ghcr.yamland paste in the following content:# .github/workflows/publish-ghcr.yaml name: Docker Image CI/CD for GHCR on: pull_request: branches: - main push: branches: - main jobs: build_and_publish: runs-on: ubuntu-latest permissions: contents: read packages: write steps: - name: Checkout GitHub Action uses: actions/checkout@v4 - name: Login to GitHub Container Registry uses: docker/login-action@v3 with: registry: ghcr.io username: ${{ github.actor }} password: ${{ secrets.GITHUB_TOKEN }} - name: Set Repository Owner Name to Lower Case run: | echo "REPO_OWNER_LC=${OWNER,,}" >> ${GITHUB_ENV} env: OWNER: '${{ github.repository_owner }}' - name: Build Docker Image and Push to GHCR run: | docker build . --tag ghcr.io/$REPO_OWNER_LC/astroplate:latest docker push ghcr.io/$REPO_OWNER_LC/astroplate:latest - name: Dokploy Deployment uses: benbristow/[email protected] with: auth_token: ${{ secrets.DOKPLOY_AUTH_TOKEN }} application_id: ${{ secrets.DOKPLOY_APPLICATION_ID }} dokploy_url: ${{ secrets.DOKPLOY_URL }}Here’s a brief description of the workflow configurations:
- Workflow is triggered when pushed to main branch
- Jobs are given permission to read content and write packages (Essential for GHCR)
- Login to GHCR using the ephemeral
secrets.GITHUB_TOKEN - Letter case conversion of GitHub Username to lowercase for consistency
- Build docker image with specified tag and push to
ghcr.io - A Dokploy webhook is triggered to pull the new docker image
Commit and sync the changes to GitHub, the workflow will be triggered and the docker image of “astroplate” should be uploaded to GitHub Container Registry. The docker image can be found in the repository’s Packages.
Step 5: Setting up Dokploy Application with CI/CD
- Go to GitHub’s Developer settings, create a classic Personal Access Token (PAT) with permission for “write:packages”, name it GHCR_PAT.
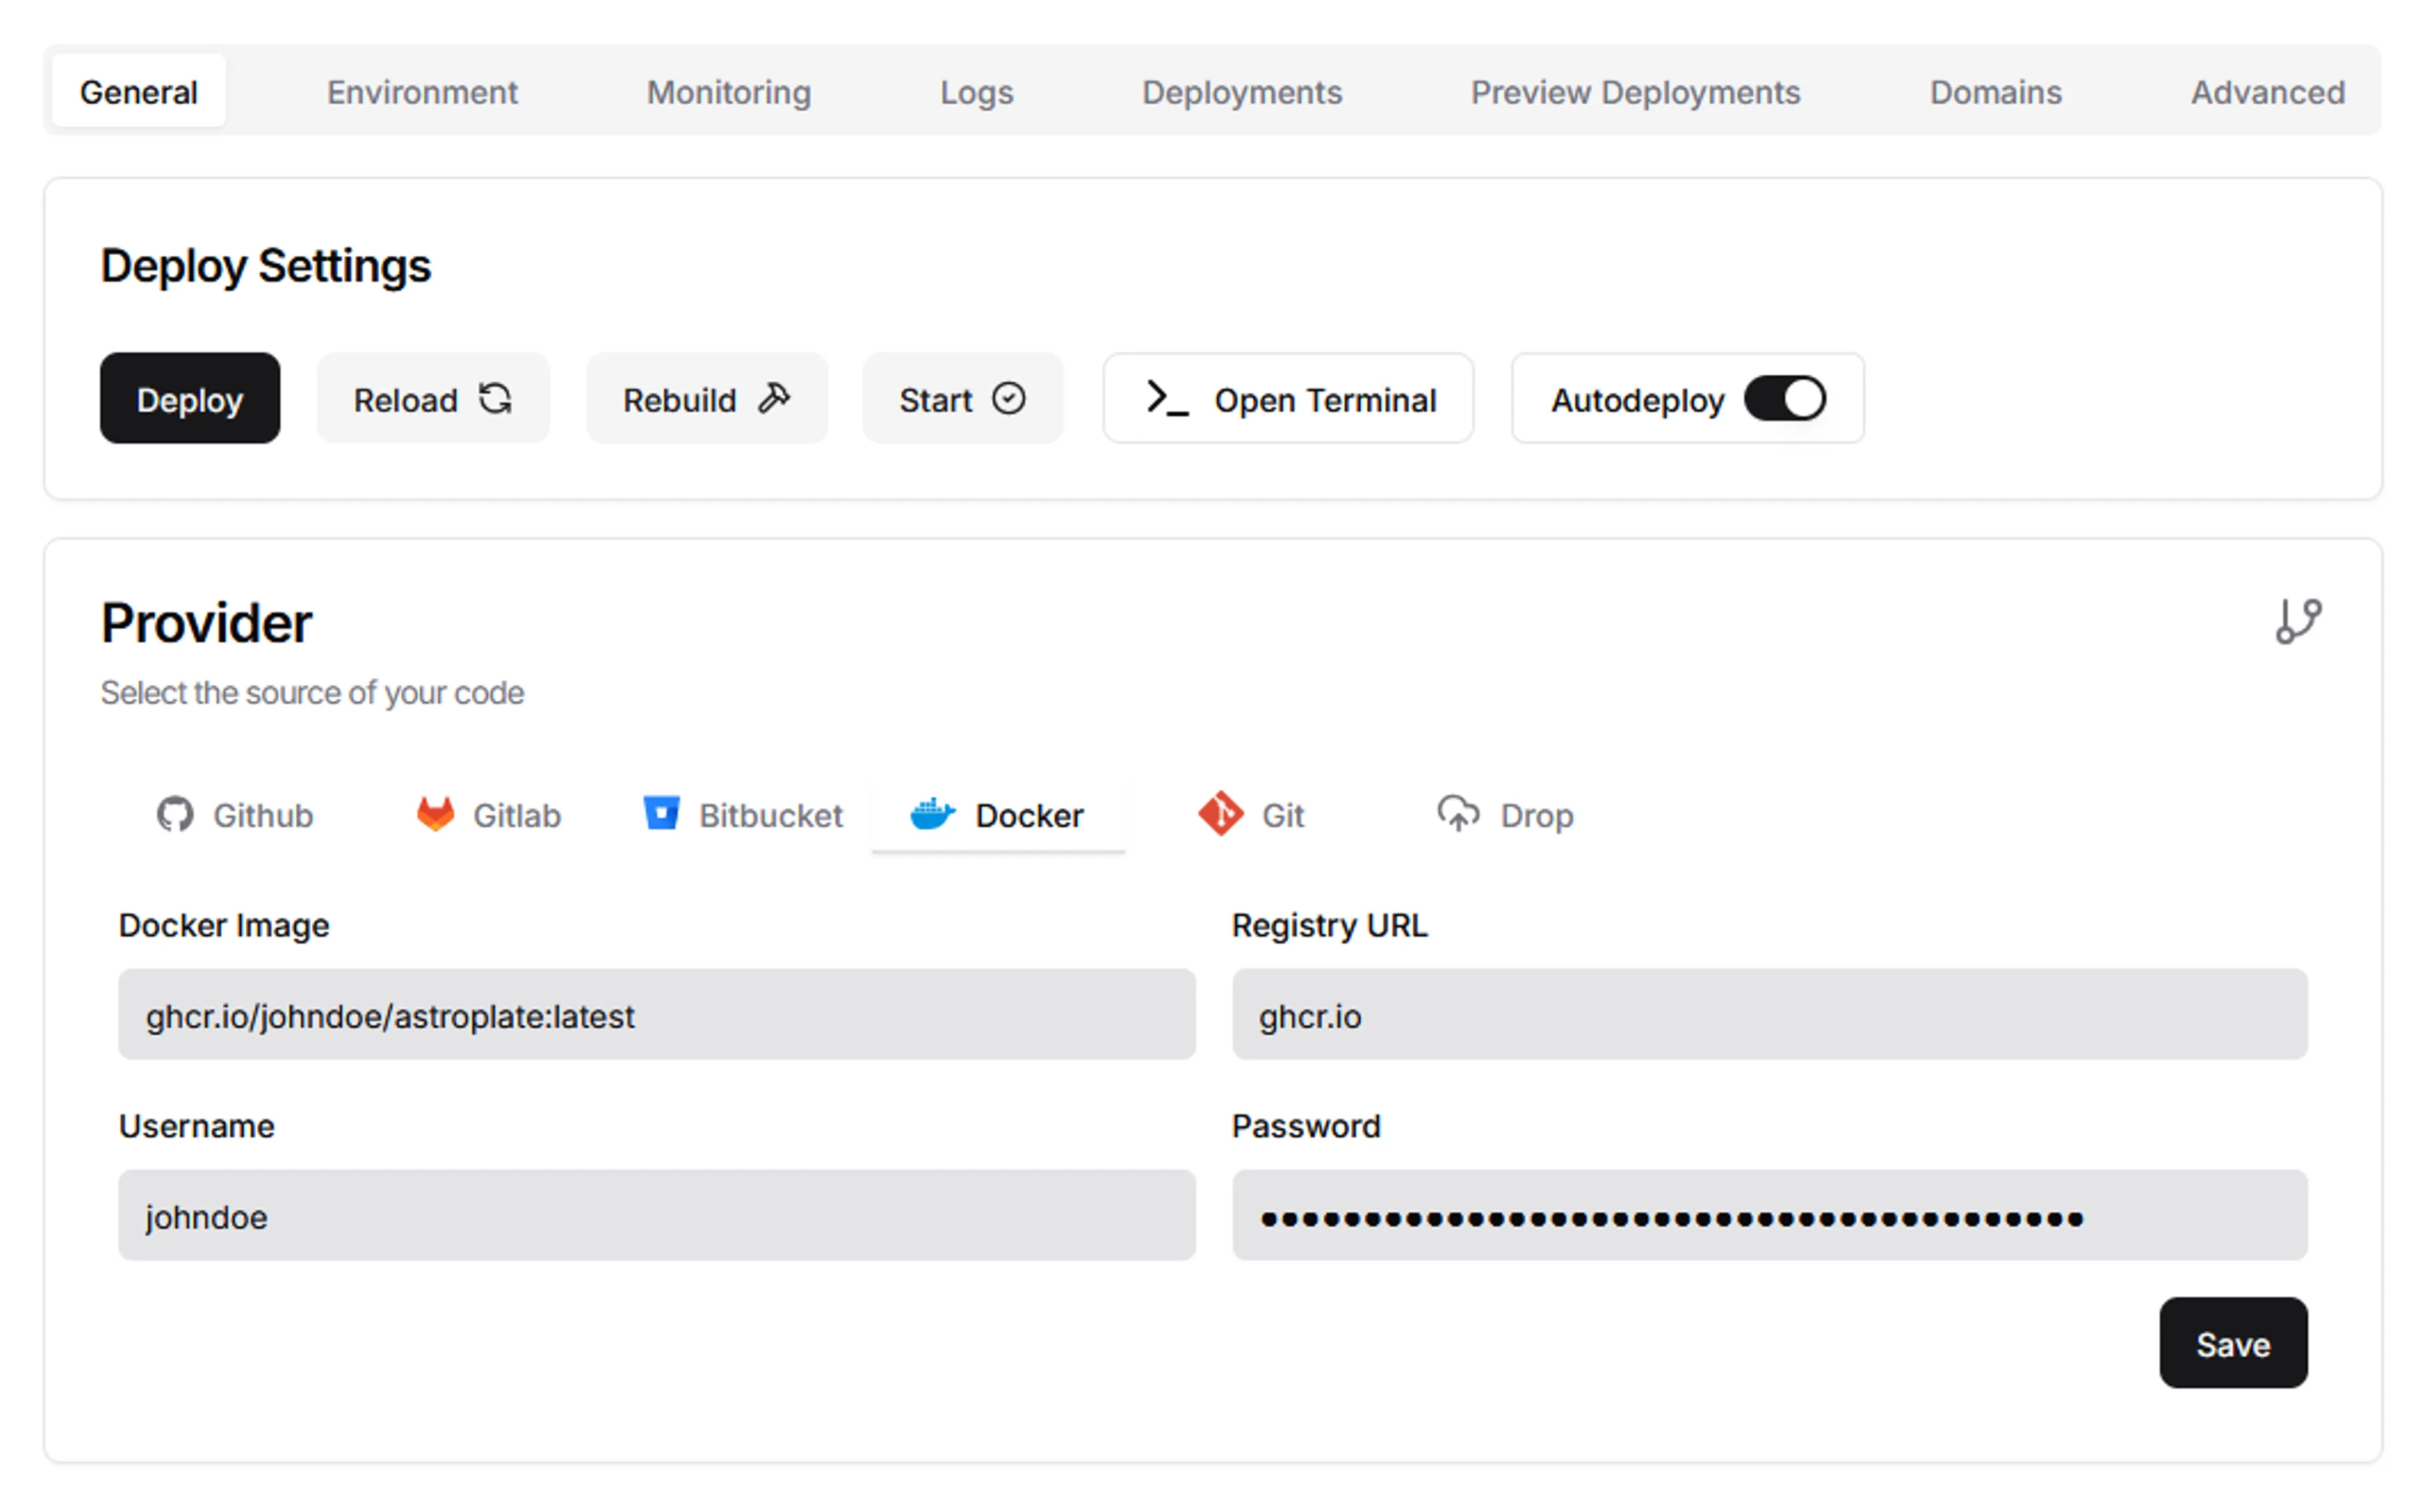
- Navigate to “Projects > Project-Name > Service-App-Name”, under the General tab of “Provider”, select “Docker” and fill in the details.
- Docker Image - ghcr.io/johndoe/astroplate:latest
- Registry URL - ghcr.io
- Username - johndoe (GitHub Username)
- Password - *** (GHCR_PAT)
Dokploy App Provider - Navigate to “Domains” tab and fill in the details.

Dokploy App Domain - Go back to the “General” tab, click “Deploy” and ensure that “Autodeploy” is enabled.
- Wait for Dokploy to pull the docker image and deploy it, you can check the completion of the deployment status from the “Deployments” tab.
- Visit your purchased domain of “https://example.com” and it should show the Astroplate frontend.
CI/CD Mechanism
- Whenever new code is pushed to Github
- GitHub Action workflow “publish-ghcr.yaml” will be triggered
- A new docker image will be built and pushed to GitHub Container Registry
- The Dokploy webhook will be triggered to notify the Dokploy app for automated deployment
- New changes should be reflected on the website shortly after
Conclusion
It has been a rather fulfilling journey of growth on the road to an all-encompassing fullstack skillset, both in developing this website using the abovementioned methodologies and documenting the whole process to share it with the world. I hope this guide serve as a cornerstone to further empower you to build and deploy web applications with confidence!
Reference
- Hetzner - Basic Cloud Config (Source)
- Hetzner - Securing the SSH service (Source)
- Hetzner - How to Keep Your Ubuntu Server Safe (Source)
- Dokploy - Going Production (Source)
- GitHub - Working with the Container registry (Source)
- Pushing container images to GitHub Container Registry with GitHub Actions (Source)
